本文是「深入 Open Agent SDK (Swift)」系列第四篇。
单个 Agent 再强,也只是一个执行者。真实的开发任务往往是多步骤、多角色的:先有人探索代码库,有人设计方案,再有人写代码、跑测试。一个 Agent 单干,上下文容易膨胀,效率也上不去。
Open Agent SDK 从三个层面解决这个问题:
这篇文章逐一分析这三个层面的实现,最后看它们怎么组合起来做任务编排。
子 Agent 的生成不是 AgentTool 直接 new 一个 Agent 出来——中间隔了一层协议。SubAgentSpawner 定义在 Types/AgentTypes.swift 里:
public protocol SubAgentSpawner: Sendable {
func spawn(
prompt: String,
model: String?,
systemPrompt: String?,
allowedTools: [String]?,
maxTurns: Int?
) async -> SubAgentResult
func spawn(
prompt: String,
model: String?,
systemPrompt: String?,
allowedTools: [String]?,
maxTurns: Int?,
disallowedTools: [String]?,
mcpServers: [AgentMcpServerSpec]?,
skills: [String]?,
runInBackground: Bool?,
isolation: String?,
name: String?,
teamName: String?,
mode: PermissionMode?,
resume: String?
) async -> SubAgentResult
}
两个方法,一个基础版(5 个参数),一个增强版(13 个参数)。协议还提供了默认实现,增强版直接调用基础版,这样已有的实现类不用改代码就能兼容。
为什么要把 spawner 放在 Types/ 而不是 Core/?因为 Tools/Advanced/AgentTool.swift 需要用它,但 Tools/ 不应该导入 Core/。把协议定义在 Types/,具体实现放在 Core/,通过 ToolContext.agentSpawner 注入——这是 SDK 里常见的依赖倒置。
DefaultSubAgentSpawner 在 Core/DefaultSubAgentSpawner.swift 里,做了这几件事:
final class DefaultSubAgentSpawner: SubAgentSpawner, @unchecked Sendable {
private let apiKey: String
private let baseURL: String?
private let parentModel: String
private let parentTools: [ToolProtocol]
private let provider: LLMProvider
private let client: (any LLMClient)?
func spawn(...) async -> SubAgentResult {
// 1. 过滤掉 AgentTool,防止无限递归
var subTools = parentTools.filter { $0.name != "Agent" }
// 2. 如果指定了 allowedTools,进一步过滤
if let allowed = allowedTools, !allowed.isEmpty {
let allowedSet = Set(allowed)
subTools = subTools.filter { allowedSet.contains($0.name) }
}
// 3. disallowedTools 再过一遍(优先级高于 allowedTools)
if let disallowed = disallowedTools, !disallowed.isEmpty {
let disallowedSet = Set(disallowed)
subTools = subTools.filter { !disallowedSet.contains($0.name) }
}
// 4. 创建子 Agent 并执行
let options = AgentOptions(
apiKey: apiKey,
model: model ?? parentModel,
systemPrompt: systemPrompt,
maxTurns: maxTurns ?? 10,
tools: subTools
)
let agent = Agent(options: options)
let result = await agent.prompt(prompt)
return SubAgentResult(
text: result.text.isEmpty
? "(Subagent completed with no text output)"
: result.text,
toolCalls: [],
isError: result.status != .success
)
}
}
几个关键点:
allowedTools / disallowedTools 限制spawn() 后会 await,等子 Agent 跑完才继续AgentTool 是暴露给 LLM 的工具。LLM 调用 Agent 工具时传入 prompt 和参数,AgentTool 负责调用 spawner 生成子 Agent。
它内置了两种预定义的子 Agent 类型:
private let BUILTIN_AGENTS: [String: AgentDefinition] = [
"Explore": AgentDefinition(
name: "Explore",
description: "Fast agent specialized for exploring codebases...",
systemPrompt: "You are a codebase exploration agent. Search through files and code to answer questions...",
tools: ["Read", "Glob", "Grep", "Bash"],
maxTurns: 10
),
"Plan": AgentDefinition(
name: "Plan",
description: "Software architect agent for designing implementation plans...",
systemPrompt: "You are a software architect. Design implementation plans...",
tools: ["Read", "Glob", "Grep", "Bash"],
maxTurns: 10
),
]
LLM 调用 AgentTool 时,通过 subagent_type 字段指定用哪种:
{
"prompt": "Explore the project structure and find all Swift source files",
"description": "Explore codebase",
"subagent_type": "Explore"
}
AgentTool 还支持一堆可选参数:model(指定模型)、maxTurns(覆盖轮次上限)、run_in_background(后台运行)、isolation(隔离模式,比如 worktree)、team_name(关联团队)、mode(权限模式)。这些参数直接透传给 spawner。
SDK 自带了一个 SubagentExample,演示了主 Agent 作为协调者,通过 AgentTool 委派 Explore 子 Agent 的完整流程:
// 主 Agent 的系统提示
let systemPrompt = """
You are a coordinator agent. When given a task, you should delegate it to a sub-agent \
using the Agent tool. The Agent tool will spawn a specialized agent (e.g., "Explore" type) \
that can use Read, Glob, Grep, and Bash tools to investigate the codebase. \
After the sub-agent returns its findings, summarize the results for the user.
"""
// 注册工具:核心工具 + AgentTool
let agent = createAgent(options: AgentOptions(
apiKey: apiKey,
model: defaultModel,
systemPrompt: systemPrompt,
maxTurns: 10,
tools: getAllBaseTools(tier: .core) + [createAgentTool()]
))
// 发任务——主 Agent 会调用 AgentTool 委派给 Explore 子 Agent
for await message in agent.stream("""
Explore the current project directory. Find all Swift source files, \
examine the project structure, and provide a summary. \
Use the Agent tool to delegate this task to an Explore sub-agent.
""") {
switch message {
case .toolUse(let data):
if data.toolName == "Agent" {
print("[Sub-agent Delegation: \(data.toolName)]")
}
case .toolResult(let data):
print("[Result: \(data.content.prefix(200))]")
case .result(let data):
print("Turns: \(data.numTurns), Cost: $\(data.totalCostUsd)")
default:
break
}
}
执行流程:用户发 prompt -> 主 Agent 判断需要探索代码库 -> 调用 AgentTool -> AgentTool 通过 spawner 生成 Explore 子 Agent -> 子 Agent 用 Glob/Grep/Read 执行探索 -> 结果返回给主 Agent -> 主 Agent 汇总后回复用户。
子 Agent 解决了"谁干活"的问题,Task 系统解决的是"活干了多少、谁在干、结果是什么"的问题。
TaskStore 是一个 Swift Actor,保证并发安全:
public actor TaskStore {
private var tasks: [String: Task] = [:]
private var taskCounter: Int = 0
public func create(
subject: String,
description: String? = nil,
owner: String? = nil,
status: TaskStatus = .pending
) -> Task {
taskCounter += 1
let id = "task_\(taskCounter)"
let now = dateFormatter.string(from: Date())
let task = Task(
id: id, subject: subject, description: description,
status: status, owner: owner,
createdAt: now, updatedAt: now
)
tasks[id] = task
return task
}
}
用 Actor 而不是普通类,意味着所有方法都是隐式串行化的——不需要自己加锁。多个 Agent 同时创建任务不会出现竞态条件。
Task 有 5 种状态,流转规则很明确:
public enum TaskStatus: String, Sendable, Equatable, Codable {
case pending // 等待开始
case inProgress // 进行中
case completed // 已完成
case failed // 失败
case cancelled // 已取消
}
状态转换有约束:pending 和 inProgress 可以转到任何状态,但 completed、failed、cancelled 是终态,不可再变:
private func isValidTransition(from: TaskStatus, to: TaskStatus) -> Bool {
switch from {
case .pending, .inProgress:
return true
case .completed, .failed, .cancelled:
return false // 终态,不能再转
}
}
画成状态图:
pending ──→ inProgress ──→ completed
│ │
│ ├──→ failed
│ │
└──→ cancelled ←──┘
TaskStatus 还有个贴心的 parse() 方法,同时支持 camelCase(inProgress)和 snake_case(in_progress),因为 LLM 返回的 JSON 格式不一定统一:
public static func parse(_ string: String) -> TaskStatus? {
if let direct = TaskStatus(rawValue: string) { return direct }
// snake_case → camelCase
let camel = string
.split(separator: "_")
.enumerated()
.map { $0.offset == 0 ? String($0.element) : String($0.element).capitalized }
.joined()
return TaskStatus(rawValue: camel)
}
一个 Task 实例除了基本的状态追踪,还预留了依赖关系和元数据:
public struct Task: Sendable, Equatable, Codable {
public let id: String
public var subject: String
public var description: String?
public var status: TaskStatus
public var owner: String? // 谁在干
public let createdAt: String
public var updatedAt: String
public var output: String? // 结果
public var blockedBy: [String]? // 被哪些任务阻塞
public var blocks: [String]? // 阻塞了哪些任务
public var metadata: [String: String]?
}
blockedBy 和 blocks 字段说明 Task 系统预留了任务依赖的能力——任务 A 可以声明"我需要等任务 B 和 C 完成才能开始"。
SDK 提供了三个工具让 LLM 操作 Task 系统:
TaskCreate -- 创建任务:
public func createTaskCreateTool() -> ToolProtocol {
return defineTool(
name: "TaskCreate",
description: "Create a new task for tracking work progress.",
inputSchema: taskCreateSchema,
isReadOnly: false
) { (input: TaskCreateInput, context: ToolContext) in
guard let taskStore = context.taskStore else {
return ToolExecuteResult(content: "Error: TaskStore not available.", isError: true)
}
let initialStatus: TaskStatus = input.status.flatMap { TaskStatus.parse($0) } ?? .pending
let task = await taskStore.create(
subject: input.subject,
description: input.description,
owner: input.owner,
status: initialStatus
)
return ToolExecuteResult(
content: "Task created: \(task.id) - \"\(task.subject)\" (\(task.status.rawValue))",
isError: false
)
}
}
TaskList -- 列出任务(支持按 status 和 owner 过滤):
// LLM 可以查 "列出所有 pending 状态的任务" 或 "列出分配给 agent-1 的任务"
let tasks = await taskStore.list(status: status, owner: input.owner)
TaskUpdate -- 更新任务(状态、描述、负责人、输出):
do {
let task = try await taskStore.update(
id: input.id,
status: status,
description: input.description,
owner: input.owner,
output: input.output
)
return ToolExecuteResult(
content: "Task updated: \(task.id) - \(task.status.rawValue) - \"\(task.subject)\"",
isError: false
)
} catch let error as TaskStoreError {
return ToolExecuteResult(content: "Error: \(error.localizedDescription)", isError: true)
}
注意 TaskUpdate 会抛出 invalidStatusTransition 错误——比如试图把一个 completed 的任务改成 inProgress,LLM 会收到错误提示,可以据此调整策略。
Task 系统追踪"做什么",Team 系统解决"谁跟谁一组"。
和 TaskStore 一样,TeamStore 也是 Actor:
public actor TeamStore {
private var teams: [String: Team] = [:]
private var teamCounter: Int = 0
public func create(
name: String,
members: [TeamMember] = [],
leaderId: String = "self"
) -> Team {
teamCounter += 1
let id = "team_\(teamCounter)"
let team = Team(
id: id, name: name, members: members,
leaderId: leaderId,
createdAt: dateFormatter.string(from: Date()),
status: .active
)
teams[id] = team
return team
}
}
Team 有两种状态:active 和 disbanded。删除 Team 不是真删,而是把状态改成 disbanded——标记为 disbanded 的 Team 不允许添加/移除成员。
public enum TeamRole: String, Sendable, Equatable, Codable {
case leader // 团队领导
case member // 普通成员
}
public struct TeamMember: Sendable, Equatable, Codable {
public let name: String
public let role: TeamRole
}
TeamCreateTool 创建 Team 时,所有传入的成员默认都是 member 角色,leaderId 默认是 "self"(即创建者自己):
let members: [TeamMember] = input.members?.map { TeamMember(name: $0) } ?? []
let team = await teamStore.create(
name: input.name,
members: members,
leaderId: "self"
)
TeamStore 还提供了动态管理成员的能力:
// 添加成员
try teamStore.addMember(teamId: "team_1", member: TeamMember(name: "agent-coder"))
// 移除成员
try teamStore.removeMember(teamId: "team_1", agentName: "agent-coder")
// 查找某个 Agent 属于哪个团队
let team = await teamStore.getTeamForAgent(agentName: "agent-coder")
getTeamForAgent 对消息传递很重要——发消息时需要知道发件人属于哪个 Team,才能验证收件人是不是队友。
除了 TeamStore,还有一个 AgentRegistry 负责追踪所有活跃的 Agent:
public actor AgentRegistry {
private var agents: [String: AgentRegistryEntry] = [:]
private var nameIndex: [String: String] = [:] // name -> agentId
public func register(agentId: String, name: String, agentType: String) throws -> AgentRegistryEntry {
if nameIndex[name] != nil {
throw AgentRegistryError.duplicateAgentName(name: name)
}
let entry = AgentRegistryEntry(...)
agents[agentId] = entry
nameIndex[name] = agentId
return entry
}
public func getByName(name: String) -> AgentRegistryEntry? {
guard let agentId = nameIndex[name] else { return nil }
return agents[agentId]
}
}
名字唯一性约束——同一个 AgentRegistry 里不能注册两个同名的 Agent。nameIndex 是一个反查索引,支持 O(1) 的名字查找。
有了 Team,Agent 之间需要能通信。SDK 用的是邮箱模式(Mailbox)——发消息不直接推给对方,而是放进对方的邮箱,对方自己来取。
public actor MailboxStore {
private var mailboxes: [String: [AgentMessage]] = [:]
// 点对点发送
public func send(from: String, to: String, content: String, type: AgentMessageType = .text) {
let message = AgentMessage(from: from, to: to, content: content,
timestamp: dateFormatter.string(from: Date()), type: type)
if mailboxes[to] == nil { mailboxes[to] = [] }
mailboxes[to]?.append(message)
}
// 广播——发给所有有邮箱的 Agent
public func broadcast(from: String, content: String, type: AgentMessageType = .text) {
let timestamp = dateFormatter.string(from: Date())
for (agentName, _) in mailboxes {
let message = AgentMessage(from: from, to: agentName, content: content,
timestamp: timestamp, type: type)
mailboxes[agentName]?.append(message)
}
}
// 读取并清空邮箱
public func read(agentName: String) -> [AgentMessage] {
guard let messages = mailboxes[agentName] else { return [] }
mailboxes[agentName] = [] // 读完清空
return messages
}
}
三个核心操作:send(点对点)、broadcast(广播)、read(读取)。read 是破坏性读取——读一次邮箱就清空了。broadcast 只发给已经有邮箱的 Agent,不会凭空创建邮箱。
消息类型除了普通文本(.text),还有 .shutdownRequest、.shutdownResponse、.planApprovalResponse——这些特殊类型用于团队管理的协调操作。
SendMessageTool 做了三层校验:
// 1. 必须有 MailboxStore
guard let mailboxStore = context.mailboxStore else { ... }
// 2. 必须有 TeamStore
guard let teamStore = context.teamStore else { ... }
// 3. 必须知道发送者是谁
guard let senderName = context.senderName else { ... }
// 4. 发送者必须在某个 Team 里
guard let team = await teamStore.getTeamForAgent(agentName: senderName) else { ... }
// 5. 收件人必须是同 Team 的成员
let isMember = team.members.contains { $0.name == input.to }
guard isMember else { ... }
广播用 "*" 作为收件人:
{ "to": "*", "message": "Phase 1 complete, starting Phase 2." }
点对点用具体名字:
{ "to": "agent-coder", "message": "Here's the spec for module A." }
校验不通过时返回错误信息,LLM 能看到哪些成员可用,可以调整发送目标。
单个 Agent、Task、Team、Mailbox 各自能做什么清楚了。实际场景中怎么组合?看一个典型的工作流。
最简单的模式。主 Agent 收到复杂任务后,同时启动多个子 Agent 各自处理一部分:
let agent = createAgent(options: AgentOptions(
apiKey: apiKey,
model: "claude-sonnet-4-6",
systemPrompt: """
You are a coordinator. Break complex tasks into subtasks, \
delegate each to an Explore sub-agent, then synthesize results.
""",
maxTurns: 20,
tools: getAllBaseTools(tier: .core) + [
createAgentTool(),
createTaskCreateTool(),
createTaskUpdateTool(),
createTaskListTool()
],
taskStore: TaskStore()
))
LLM 可能这样编排:
TaskCreate("Analyze module A") -- 创建任务Agent(prompt: "Analyze module A", subagent_type: "Explore") -- 委派子 AgentTaskUpdate(id: "task_1", status: "completed", output: result) -- 标记完成需要多个 Agent 长期协作时,用 Team + Mailbox:
let mailboxStore = MailboxStore()
let teamStore = TeamStore()
let agent = createAgent(options: AgentOptions(
apiKey: apiKey,
model: "claude-sonnet-4-6",
agentName: "coordinator",
mailboxStore: mailboxStore,
teamStore: teamStore,
tools: getAllBaseTools(tier: .core) + [
createAgentTool(),
createTeamCreateTool(),
createTeamDeleteTool(),
createSendMessageTool(),
createTaskCreateTool(),
createTaskListTool(),
createTaskUpdateTool()
]
))
LLM 的编排可能像这样:
TeamCreate(name: "refactor-team", members: ["explorer", "planner", "coder"]) -- 建团队TaskCreate("Explore codebase", owner: "explorer") -- 创建任务Agent(prompt: "...", name: "explorer", subagent_type: "Explore") -- 启动探索 AgentSendMessage(to: "planner", message: "Exploration done, here's the summary...") -- 通知规划 AgentTaskCreate("Write implementation plan", owner: "planner") -- 下一个任务用 Task 系统做工作队列,主 Agent 创建一批任务,子 Agent 逐个领取执行:
主 Agent:
TaskCreate("Fix bug #1") → task_1 (pending)
TaskCreate("Fix bug #2") → task_2 (pending)
TaskCreate("Add feature X") → task_3 (pending)
子 Agent A:
TaskList(status: "pending") → [task_1, task_2, task_3]
TaskUpdate(task_1, status: "in_progress", owner: "agent-a")
... 干活 ...
TaskUpdate(task_1, status: "completed", output: "Fixed by ...")
子 Agent B:
TaskList(status: "pending") → [task_2, task_3]
TaskUpdate(task_2, status: "in_progress", owner: "agent-b")
... 干活 ...
TaskStore 是 Actor,多个 Agent 并发更新同一条任务不会出问题(先到先得),但不会自动分配——需要 LLM 自己协调谁认领哪个任务。
这套多 Agent 协作机制有几个设计选择:
为什么子 Agent 不能再生子 Agent? DefaultSubAgentSpawner 在创建子 Agent 时过滤掉了 AgentTool。这是有意的限制——如果不限制,一个 Agent 生成一个 Agent 再生成一个 Agent,递归深度不可控,token 消耗也会指数级增长。
为什么消息是拉取(Pull)不是推送(Push)? MailboxStore.read() 是破坏性读取,Agent 需要主动调用才能收到消息。这比推送模式简单得多——不需要维护回调、不需要处理 Agent 离线的情况。代价是实时性差,但在 Agent Loop 的工具调用频率下(每个 turn 都可以调工具),拉取的延迟可以接受。
为什么 Task 的状态机没有自动流转? blockedBy 字段只是声明了依赖关系,但 TaskStore.update() 不会自动检查前置任务是否完成。这意味着"等任务 A 做完再做任务 B"这个逻辑需要 LLM 自己实现——调 TaskList 看状态,再决定下一步。这是一个务实的取舍:自动依赖解析可以加,但对 LLM 来说,显式检查反而更可控。
Open Agent SDK 的多 Agent 协作由三层构成:
SubAgentSpawner 协议和 AgentTool 实现,主 Agent 在运行时动态生成子 Agent 委派任务,内置 Explore 和 Plan 两种类型TaskStore Actor 的任务追踪,有明确的状态机(pending -> inProgress -> completed/failed/cancelled),终态不可逆转TeamStore 管理团队和成员,MailboxStore 实现邮箱式消息传递,支持点对点和广播三层可以独立使用,也可以组合——用 Task 追踪进度,用 Team 组织成员,用 Mailbox 协调通信,用子 Agent 执行具体工作。
下一篇会看 SDK 的 会话持久化:Agent 对话历史怎么存、怎么恢复、怎么在重启后继续之前的工作。
系列文章:
GitHub:terryso/open-agent-sdk-swift
本文是「深入 Open Agent SDK (Swift)」系列第五篇。
Agent 不只是一次性问答工具。真正有用的 Agent 要做到三件事:记住上下文(上次聊到哪了)、控制权限(哪些操作能做)、审计行为(谁在什么时候干了什么)。Open Agent SDK 用四个子系统来覆盖这些需求——SessionStore、PermissionPolicy、SandboxSettings、HookRegistry。
这篇文章分析这四个子系统的实现细节,看它们各自怎么工作,以及怎么组合起来构建一个安全的 Agent。
Agent Loop 每次运行会产生一组 messages 数组。如果不保存,进程退出就没了。SessionStore 负责把这些对话历史持久化到磁盘,下次启动时恢复。
SessionStore 是一个 actor,所有方法都需要 await 调用。默认把会话存在 ~/.open-agent-sdk/sessions/ 目录下,每个 session 一个子目录,里面放一个 transcript.json。
let sessionStore = SessionStore() // 默认路径
let sessionStore = SessionStore(sessionsDir: "/custom/path") // 自定义路径
SessionStore 提供五个核心方法,覆盖会话的完整生命周期。
save — 保存会话。把 messages 数组和元数据序列化成 JSON 写入磁盘:
try await sessionStore.save(
sessionId: "my-session",
messages: messages,
metadata: PartialSessionMetadata(
cwd: "/project",
model: "claude-sonnet-4-6",
summary: "代码分析会话",
tag: "analysis",
firstPrompt: "分析项目结构"
)
)
存储结构长这样:
~/.open-agent-sdk/sessions/
my-session/
transcript.json // { "metadata": {...}, "messages": [...] }
文件权限是 0600,目录权限是 0700——只有当前用户能读写。每次 save 会保留第一次创建时的 createdAt 时间戳,只更新 updatedAt。
load — 加载会话。从磁盘读取 transcript.json,反序列化为 SessionData:
if let data = try await sessionStore.load(sessionId: "my-session") {
print("Messages: \(data.metadata.messageCount)")
print("Model: \(data.metadata.model)")
// data.messages 是 [[String: Any]] 数组
}
load 支持分页参数 limit 和 offset,不需要加载全部消息时可以只取尾部:
// 只加载最近 50 条消息
let recent = try await sessionStore.load(sessionId: "my-session", limit: 50, offset: nil)
list — 列出所有会话,按 updatedAt 降序排列(最近的在前):
let sessions = try await sessionStore.list(limit: 10)
for session in sessions {
print("\(session.id) — \(session.summary ?? "(无标题)") [\(session.messageCount) 条消息]")
}
SessionMetadata 包含 id、cwd、model、createdAt、updatedAt、messageCount,以及可选的 summary、tag、firstPrompt、gitBranch、fileSize。
fork — 分叉会话。从已有会话复制消息到新 session,可以指定截断点:
// 完整复制
let newId = try await sessionStore.fork(sourceSessionId: "my-session")
// 只复制前 10 条消息
let truncatedId = try await sessionStore.fork(
sourceSessionId: "my-session",
upToMessageIndex: 10
)
// 指定新 session ID
let customId = try await sessionStore.fork(
sourceSessionId: "my-session",
newSessionId: "forked-session"
)
delete — 删除整个会话目录:
let deleted = try await sessionStore.delete(sessionId: "my-session")
此外还有 rename(改标题)和 tag(打标签)两个辅助方法。
把 SessionStore 注入 Agent 后,SDK 提供三种恢复策略:
1. 指定 sessionId 恢复
最直接的方式:给定一个 session ID,Agent 启动时从 SessionStore 加载历史消息,追加到 messages 数组前面:
let agent = createAgent(options: AgentOptions(
apiKey: apiKey,
model: "claude-sonnet-4-6",
sessionStore: sessionStore,
sessionId: "my-session" // 指定恢复哪个 session
))
2. continueRecentSession — 自动接续最近的会话
不知道 session ID 时,让 SDK 自动找最近的一个:
let agent = createAgent(options: AgentOptions(
apiKey: apiKey,
model: "claude-sonnet-4-6",
sessionStore: sessionStore,
continueRecentSession: true // 自动加载最近的 session
))
内部实现是调 sessionStore.list() 取第一个(已按 updatedAt 降序排列),把它的 ID 作为恢复目标。
3. forkSession + resumeSessionAt — 分叉并截断
在已有会话的基础上分叉一个新分支,还可以截断到指定消息:
let agent = createAgent(options: AgentOptions(
apiKey: apiKey,
model: "claude-sonnet-4-6",
sessionStore: sessionStore,
sessionId: "my-session",
forkSession: true, // 复制到新 session
resumeSessionAt: "msg-uuid-123" // 截断到这条消息
))
SDK 内部的解析顺序是:先 continueRecentSession 确定 session ID,再 forkSession 创建分叉,再 resumeSessionAt 截断历史。这三个选项可以独立使用也可以组合。
SessionStore 在 session ID 校验上做了路径遍历防护:
private func validateSessionId(_ sessionId: String) throws {
guard !sessionId.isEmpty else {
throw SDKError.sessionError(message: "Session ID must not be empty")
}
let forbidden = ["/", "\\", ".."]
for component in forbidden {
if sessionId.contains(component) {
throw SDKError.sessionError(message: "Session ID contains invalid character: '\(component)'")
}
}
}
session ID 里不能包含 /、\、..——防止攻击者通过构造 ID 来读写预期之外的路径。
会话持久化解决了"记住"的问题,权限控制解决的是"能做什么"的问题。
SDK 定义了 6 种权限模式:
| 模式 | 行为 |
|---|---|
default |
每次工具执行前询问用户 |
plan |
只读工具直接执行,写操作需要确认 |
auto |
自动执行所有工具,危险操作除外 |
acceptEdits |
文件编辑自动执行,其他操作需要确认 |
dontAsk |
不询问用户,根据上下文自动判断 |
bypassPermissions |
跳过所有权限检查 |
let agent = createAgent(options: AgentOptions(
apiKey: apiKey,
model: "claude-sonnet-4-6",
permissionMode: .plan // 只读工具直接跑,写操作要确认
))
permissionMode 是全局开关,粒度比较粗。如果你需要按工具名称或工具属性做精细控制,用 canUseTool 回调:
let agent = createAgent(options: AgentOptions(
apiKey: apiKey,
model: "claude-sonnet-4-6",
permissionMode: .bypassPermissions,
canUseTool: { tool, input, context in
if tool.name == "Bash" {
return CanUseToolResult.deny("Bash is not allowed")
}
return nil // nil 表示"我没意见,交给 permissionMode 决定"
}
))
canUseTool 返回 CanUseToolResult?。返回 nil 表示该回调没有意见,交给下一个检查环节;返回非 nil 结果时,SDK 用回调的决定,不再看 permissionMode。
CanUseToolResult 有三个工厂方法:
CanUseToolResult.allow() // 允许
CanUseToolResult.deny("原因") // 拒绝
CanUseToolResult.allowWithInput(modifiedInput) // 允许但修改输入参数
allowWithInput 比较少见但很实用——你可以在权限检查时修改工具的输入参数。比如把文件写入路径重定向到安全目录。
直接写闭包虽然灵活,但不方便复用。SDK 提供了 PermissionPolicy 协议,把权限判断封装成可组合的策略:
public protocol PermissionPolicy: Sendable {
func evaluate(
tool: ToolProtocol,
input: Any,
context: ToolContext
) async -> CanUseToolResult?
}
SDK 内置了四个策略:
ToolNameAllowlistPolicy — 白名单,只允许指定的工具:
let policy = ToolNameAllowlistPolicy(allowedToolNames: ["Read", "Glob", "Grep"])
// Write、Edit、Bash 等工具全部被拒绝
ToolNameDenylistPolicy — 黑名单,拒绝指定的工具:
let policy = ToolNameDenylistPolicy(deniedToolNames: ["Bash", "Write"])
// 其他工具正常执行
ReadOnlyPolicy — 只允许只读工具(isReadOnly == true):
let policy = ReadOnlyPolicy()
// Read、Glob、Grep、WebSearch 等只读工具允许
// Write、Edit、Bash 等变更工具被拒绝
CompositePolicy — 组合多个策略,按顺序评估:
let policy = CompositePolicy(policies: [
ToolNameDenylistPolicy(deniedToolNames: ["Bash"]),
ReadOnlyPolicy()
])
// 先检查黑名单(Bash 被拒绝),再检查只读策略
CompositePolicy 的评估规则:
用 canUseTool(policy:) 桥接函数把策略转成回调:
let policy = CompositePolicy(policies: [
ToolNameDenylistPolicy(deniedToolNames: ["Bash"]),
ReadOnlyPolicy()
])
let agent = createAgent(options: AgentOptions(
apiKey: apiKey,
model: "claude-sonnet-4-6",
permissionMode: .bypassPermissions,
canUseTool: canUseTool(policy: policy)
))
权限控制管的是"这个工具能不能执行",沙盒管的是"这个操作在不在允许范围内"。比如 Bash 工具通过了权限检查,但你还得确保它不会 rm -rf /。
let sandbox = SandboxSettings(
// 路径控制
allowedReadPaths: ["/project/"],
allowedWritePaths: ["/project/build/"],
deniedPaths: ["/etc/", "/var/"],
// 命令控制
deniedCommands: ["rm", "sudo"], // 黑名单
// allowedCommands: ["git", "swift"], // 白名单(和黑名单二选一)
// 行为控制
allowNestedSandbox: false,
autoAllowBashIfSandboxed: false, // 沙箱激活时自动批准 Bash
allowUnsandboxedCommands: false,
enableWeakerNestedSandbox: false,
// 网络控制
network: SandboxNetworkConfig(
allowedDomains: ["api.example.com"],
allowLocalBinding: false
)
)
路径和命令各有两种模式:
allowedReadPaths / allowedWritePaths 是白名单(空数组=全部允许),deniedPaths 是黑名单(优先级更高)allowedCommands 是白名单(设为非 nil 就只允许列出的命令),deniedCommands 是黑名单。allowedCommands 优先级高于 deniedCommandsSandboxChecker 是一个无状态的枚举类,提供 isPathAllowed、checkPath、isCommandAllowed、checkCommand 四个静态方法。isXxx 返回 Bool,checkXxx 不通过时抛出 SDKError.permissionDenied。
路径检查用前缀匹配加段边界保证:
// /project/ 匹配 /project/src/file.swift
// /project/ 不匹配 /project-backup/file.swift
SandboxChecker.isPathAllowed("/project/src/main.swift", for: .read, settings: sandbox)
// -> true
SandboxChecker.isPathAllowed("/project-backup/old.swift", for: .read, settings: sandbox)
// -> false(段边界不匹配)
实现关键在于 SandboxPathNormalizer——先把路径规范化(解析 ..、.、symlink),再做前缀比较时保证尾部有 / 来强制段边界。
// 路径遍历攻击会被 normalize 掉
let normalized = SandboxPathNormalizer.normalize("/project/src/../../etc/passwd")
// -> "/etc/passwd",然后被 deniedPaths 拦截
命令检查分三个阶段:
bash -c "cmd"、$(cmd)、`cmd` 等绕过模式/usr/bin/rm -rf /tmp 提取出 rm// 黑名单里有 "rm"
SandboxChecker.isCommandAllowed("rm -rf /tmp", settings: blocklist)
// -> false
// 路径形式的命令也能识别
SandboxChecker.isCommandAllowed("/usr/bin/rm -rf /tmp", settings: blocklist)
// -> false(提取 basename 得到 "rm")
// 反斜杠绕过
SandboxChecker.isCommandAllowed("\\rm -rf /tmp", settings: blocklist)
// -> false(去掉前导 \ 后得到 "rm")
// 引号绕过
SandboxChecker.isCommandAllowed("\"rm\" -rf /tmp", settings: blocklist)
// -> false(去掉引号后得到 "rm")
// 子 shell 绕过
SandboxChecker.isCommandAllowed("bash -c \"rm -rf /tmp\"", settings: blocklist)
// -> false(递归检查内部命令)
对于无法可靠解析的命令(比如多层嵌套的 bash -c "bash -c 'rm ...'"),默认拒绝。
命令参数中的文件路径也会被提取并检查——如果命令里出现了 deniedPaths 中的路径,命令也会被拒绝。
这个选项是沙盒和权限系统的桥梁。当 autoAllowBashIfSandboxed = true 时,Bash 工具会跳过 canUseTool 权限回调检查,但仍然经过 SandboxChecker.checkCommand() 的命令过滤。
设计思路是:如果你已经配了完善的沙盒规则,Bash 命令能做什么已经被限制住了,不需要再弹一次权限确认。
前三个系统解决的是"能不能做"的问题,Hook 系统解决的是"做了之后要知道"和"做之前要干预"的问题。
SDK 定义了 24 个生命周期事件:
| 事件 | 触发时机 |
|---|---|
preToolUse |
工具执行前 |
postToolUse |
工具执行成功后 |
postToolUseFailure |
工具执行失败后 |
sessionStart |
Agent 会话开始 |
sessionEnd |
Agent 会话结束 |
stop |
Agent Loop 停止 |
subagentStart |
子 Agent 启动 |
subagentStop |
子 Agent 完成 |
userPromptSubmit |
用户提交 prompt |
permissionRequest |
权限检查发生 |
permissionDenied |
权限被拒绝 |
taskCreated |
任务创建 |
taskCompleted |
任务完成 |
configChange |
配置变更 |
cwdChanged |
工作目录变更 |
fileChanged |
文件变更 |
notification |
通知事件 |
preCompact |
对话压缩前 |
postCompact |
对话压缩后 |
teammateIdle |
团队成员空闲 |
setup |
Agent 初始化 |
worktreeCreate |
工作树创建 |
worktreeRemove |
工作树移除 |
Hook 有两种实现方式:函数回调和 Shell 命令。
函数 Hook — Swift 闭包,适合进程内逻辑:
await registry.register(.preToolUse, definition: HookDefinition(
handler: { input in
// input 是 HookInput,包含 event、toolName、toolInput、sessionId 等
return HookOutput(message: "拦截成功", block: true)
}
))
Shell Hook — 外部命令,适合集成非 Swift 脚本:
await registry.register(.preToolUse, definition: HookDefinition(
command: "python3 /path/to/check.py" // HookInput 通过 stdin JSON 传入
))
Shell Hook 通过 ShellHookExecutor 执行:用 /bin/bash -c 启动进程,把 HookInput 序列化为 JSON 写入 stdin,从 stdout 读取 HookOutput JSON。Shell 命令的标准输出如果不是合法 JSON,会被包装成 HookOutput(message: stdout)。
Shell Hook 的环境变量里会注入 HOOK_EVENT、HOOK_TOOL_NAME、HOOK_SESSION_ID、HOOK_CWD,方便脚本直接用环境变量判断上下文。
HookRegistry 是一个 actor,内部维护 [HookEvent: [HookDefinition]] 映射:
let registry = HookRegistry()
// 注册函数 Hook
await registry.register(.preToolUse, definition: HookDefinition(
handler: { input in
return HookOutput(message: "Bash blocked", block: true)
},
matcher: "Bash" // 只匹配 Bash 工具
))
// 注册 Shell Hook
await registry.register(.postToolUse, definition: HookDefinition(
command: "/usr/bin/logger 'Tool executed'",
timeout: 5000 // 5 秒超时
))
// 执行所有注册在某事件上的 Hook
let results = await registry.execute(.preToolUse, input: hookInput)
// results: [HookOutput],包含所有匹配的 Hook 的返回值
matcher 过滤:每个 HookDefinition 可以设一个 matcher(正则表达式)。执行时先检查 input.toolName 是否匹配 matcher,不匹配就跳过这个 Hook。matcher 为 nil 时匹配所有工具。
超时处理:函数 Hook 用 withThrowingTaskGroup 实现超时——把实际执行和 Task.sleep 放在同一个 TaskGroup 里,谁先完成用谁。超时的 Hook 不影响其他 Hook 执行。Shell Hook 通过 DispatchQueue.asyncAfter 设置超时,到时间就 terminate 进程。
执行顺序:同一事件上的 Hook 按注册顺序串行执行。
HookOutput 可以做这些事:
HookOutput(
message: "日志消息", // 附加信息
block: true, // 拦截操作
notification: HookNotification( // 发送通知
title: "警告",
body: "检测到危险操作",
level: .warning
),
permissionUpdate: PermissionUpdate( // 动态修改权限
tool: "Bash",
behavior: .deny
),
systemMessage: "请在沙箱内操作", // 注入系统消息
reason: "安全策略", // 拦截原因
updatedInput: ["command": "echo safe"], // 修改工具输入
decision: .block // 显式 approve/block
)
其中 block: true 会阻止工具执行,返回一个错误结果给 LLM。permissionUpdate 可以在 Hook 运行时动态修改工具权限。updatedInput 可以替换工具的输入参数。
四个子系统各有分工:
下面用一个完整的例子展示怎么把它们组合起来:
import Foundation
import OpenAgentSDK
// 1. 创建 SessionStore
let sessionStore = SessionStore()
// 2. 创建 HookRegistry,注册审计和安全拦截
let hookRegistry = HookRegistry()
// 记录所有工具执行
await hookRegistry.register(.postToolUse, definition: HookDefinition(
handler: { input in
if let toolName = input.toolName {
print("[审计] 工具 \(toolName) 执行完成")
}
return nil
}
))
// 拦截 Bash 中的危险命令
await hookRegistry.register(.preToolUse, definition: HookDefinition(
handler: { input in
return HookOutput(
message: "Bash 被安全策略拦截",
block: true,
decision: .block
)
},
matcher: "Bash"
))
// 记录权限拒绝事件
await hookRegistry.register(.permissionDenied, definition: HookDefinition(
handler: { input in
print("[安全告警] 权限被拒绝: \(input.error ?? "unknown")")
return nil
}
))
// 会话生命周期追踪
await hookRegistry.register(.sessionStart, definition: HookDefinition(
handler: { _ in print("[会话] 开始"); return nil }
))
await hookRegistry.register(.sessionEnd, definition: HookDefinition(
handler: { _ in print("[会话] 结束"); return nil }
))
// 3. 配置沙盒:限制路径和命令
let sandbox = SandboxSettings(
allowedReadPaths: ["/project/"],
allowedWritePaths: ["/project/src/", "/project/tests/"],
deniedPaths: ["/etc/", "/var/", "/tmp/"],
deniedCommands: ["rm", "sudo", "chmod", "chown"],
autoAllowBashIfSandboxed: false,
allowNestedSandbox: false
)
// 4. 配置权限策略:只读 + 排除 Bash
let policy = CompositePolicy(policies: [
ToolNameDenylistPolicy(deniedToolNames: ["Bash"]),
ReadOnlyPolicy()
])
// 5. 创建 Agent,注入所有组件
let agent = createAgent(options: AgentOptions(
apiKey: "sk-...",
model: "claude-sonnet-4-6",
systemPrompt: "你是一个代码分析助手。只能读取文件,不能修改。",
maxTurns: 10,
permissionMode: .bypassPermissions,
canUseTool: canUseTool(policy: policy),
sessionStore: sessionStore,
sessionId: "analysis-session",
hookRegistry: hookRegistry,
sandbox: sandbox
))
// 6. 执行查询
let result = await agent.prompt("分析项目中的 Swift 源文件结构")
print(result.text)
// 7. 后续恢复会话
let resumedAgent = createAgent(options: AgentOptions(
apiKey: "sk-...",
model: "claude-sonnet-4-6",
permissionMode: .bypassPermissions,
canUseTool: canUseTool(policy: policy),
sessionStore: sessionStore,
sessionId: "analysis-session", // 同一个 session ID,自动恢复历史
hookRegistry: hookRegistry,
sandbox: sandbox
))
let continued = await resumedAgent.prompt("继续分析测试文件")
print(continued.text)
这个 Agent 的安全特性:
/project/ 下的文件,不能碰 /etc/、/var/多层防御的好处是:即使某一层的配置有疏漏,其他层还能兜底。比如你误把 Bash 加进了白名单,Hook 的 matcher 还能拦截;即使 Hook 没拦住,沙盒的命令过滤还能挡。
SessionStore、PermissionPolicy、SandboxSettings、HookRegistry 四个系统各管一件事,但组合起来就是一套完整的安全框架:
下一篇看 SDK 的 多 LLM 提供商:怎么同时支持 Anthropic、OpenAI 和其他 LLM,Provider 协议的设计,以及运行时切换模型的机制。
系列文章:
GitHub:terryso/open-agent-sdk-swift
本文是「深入 Open Agent SDK (Swift)」系列第二篇。
上一篇分析了 Agent Loop 的运转机制,其中有一个环节是"执行工具"——LLM 说"我要调 Bash",SDK 就真的起一个进程跑命令。但这背后的工具系统远不止"调个函数"那么简单。34 个内置工具怎么组织?怎么从 LLM 的 JSON 输入安全地转成 Swift 类型?怎么控制哪些工具能用?
这篇文章从协议定义开始,一层一层看 Open Agent SDK 的工具系统。
SDK 里每个工具都遵循 ToolProtocol 协议:
public protocol ToolProtocol: Sendable {
var name: String { get }
var description: String { get }
var inputSchema: ToolInputSchema { get }
var isReadOnly: Bool { get }
var annotations: ToolAnnotations? { get }
func call(input: Any, context: ToolContext) async -> ToolResult
}
五个属性一个方法,逐个说。
name 是工具的唯一标识,LLM 在 tool_use block 里用这个名字指定要调哪个工具。所有内置工具用 PascalCase 命名:Read、Bash、Glob、CronCreate。
description 是给 LLM 看的工具说明。这段文字会作为 tool definition 的一部分发给 API,质量直接影响 LLM 什么时候会选择调用这个工具。
inputSchema 是一个 [String: Any] 类型的 JSON Schema 字典,描述工具接受的输入结构。API 调用时它被原样传给 input_schema 字段。
isReadOnly 是一个布尔标记,用来告诉 Agent Loop 这个工具有没有副作用。上一篇提到过,Agent Loop 用这个字段做分桶:只读工具并发执行,变更工具串行执行。
annotations 是可选的行为提示,包含四个布尔字段:
public struct ToolAnnotations: Sendable, Equatable {
public let readOnlyHint: Bool // 只读,无副作用
public let destructiveHint: Bool // 可能做不可逆操作
public let idempotentHint: Bool // 幂等,多次调用结果相同
public let openWorldHint: Bool // 会和外部世界交互
}
注意 destructiveHint 默认是 true——SDK 对工具采取"默认危险"策略,工具需要主动声明自己不危险。这些提示不会影响 SDK 自身的执行逻辑,但 LLM 会参考它们决定怎么使用工具。
call() 方法返回 ToolResult,这是工具执行后喂回给 LLM 的内容:
public struct ToolResult: Sendable {
public let toolUseId: String // 对应 LLM 返回的 tool_use ID
public let content: String // 文本内容
public let typedContent: [ToolContent]? // 多模态内容(文本、图片、资源引用)
public let isError: Bool // 是否为错误结果
}
content 和 typedContent 之间有个兼容设计:当 typedContent 有值时,content 会从中提取所有 .text 类型拼接返回;否则直接返回存储的字符串。这样旧代码只用 content 也能正常工作,新代码可以用 typedContent 返回图片等非文本内容。
ToolContent 是一个枚举,支持三种内容类型:
public enum ToolContent: Sendable {
case text(String)
case image(data: Data, mimeType: String)
case resource(uri: String, name: String?)
}
工具闭包内部用的是 ToolExecuteResult——结构和 ToolResult 几乎一样,只是少了 toolUseId(这个 ID 由调用层自动填充)。
ToolContext 是每次工具执行时注入的上下文,字段很多:
| 字段 | 用途 |
|---|---|
cwd |
当前工作目录 |
toolUseId |
本次调用的 tool_use ID |
agentSpawner |
子 Agent 生成器(AgentTool 用) |
cronStore |
定时任务存储(CronTools 用) |
todoStore |
待办事项存储(TodoWrite 用) |
worktreeStore |
工作树存储(WorktreeTools 用) |
planStore |
计划模式存储(PlanTools 用) |
taskStore |
任务管理存储(Task*Tools 用) |
mailboxStore |
邮箱存储(SendMessage 用) |
teamStore |
团队存储(TeamCreate 用) |
hookRegistry |
Hook 事件注册表 |
permissionMode |
权限模式 |
canUseTool |
自定义权限检查回调 |
skillRegistry |
技能注册表(SkillTool 用) |
restrictionStack |
工具限制栈 |
sandbox |
沙箱设置 |
mcpConnections |
MCP 连接信息 |
fileCache |
文件缓存 |
env |
自定义环境变量 |
这么多可选字段,规则很简单:工具需要什么就注入什么,不需要的就是 nil。Read 工具只看 cwd、sandbox、fileCache;AgentTool 只看 agentSpawner;CronTools 只看 cronStore。每个工具只依赖自己需要的那个 Store,不知道也不关心其他 Store 的存在。
ToolContext 还提供了两个 copy 方法:withToolUseId() 用于更新调用 ID(每次工具执行时由 ToolExecutor 调用),withSkillContext() 用于递增技能嵌套深度(SkillTool 调用子技能时使用)。
SDK 把 34 个工具分成三个层级:Core(10 个)、Advanced(11 个)、Specialist(13 个)。
Core 层 (10) Advanced 层 (11) Specialist 层 (13)
┌──────────┐ ┌──────────────┐ ┌───────────────┐
│ Read │ │ Agent │ │ CronCreate │
│ Write │ │ Skill │ │ CronDelete │
│ Edit │ │ TaskCreate │ │ CronList │
│ Glob │ │ TaskGet │ │ LSP │
│ Grep │ │ TaskList │ │ Config │
│ Bash │ │ TaskOutput │ │ TodoWrite │
│ AskUser │ │ TaskStop │ │ EnterPlanMode │
│ ToolSearch│ │ TaskUpdate │ │ ExitPlanMode │
│ WebFetch │ │ SendMessage │ │ EnterWorktree │
│ WebSearch │ │ TeamCreate │ │ ExitWorktree │
└──────────┘ │ TeamDelete │ │ RemoteTrigger │
│ NotebookEdit │ │ ListMcpRes │
└──────────────┘ │ ReadMcpRes │
└───────────────┘
分层的依据不是技术实现难度,而是工具的依赖复杂度和使用场景。
Core 层的 10 个工具是 Agent 的基础能力——读文件、写文件、搜索代码、跑命令。它们有一个共同特点:只依赖 ToolContext 的基础字段(cwd、sandbox、fileCache),不需要注入任何 Store。
拿 Read 工具来说。它的输入是文件路径、可选的 offset 和 limit:
private struct FileReadInput: Codable {
let file_path: String
let offset: Int?
let limit: Int?
}
执行逻辑很直接:解析路径 → 检查沙箱 → 查缓存 → 读文件 → 分页 → 返回带行号的内容。还有个文件缓存的细节:如果 context.fileCache 有值,先查缓存,命中就跳过磁盘 I/O。
再看 Bash 工具。它比 Read 复杂得多,因为要处理超时、输出截断、后台进程等问题。Bash 的输入有 5 个字段:
private struct BashInput: Codable {
let command: String
let timeout: Int?
let description: String?
let runInBackground: Bool?
let dangerouslyDisableSandbox: Bool?
}
几个关键实现细节:
DispatchQueue.global().asyncAfter 设置超时,超时后 process.terminate() 杀掉进程。...(truncated)... 连接。run_in_background = true 时,进程起起来就返回一个 task ID,不等待完成。ProcessOutputAccumulator 收集,用 @unchecked Sendable 标注,因为 Pipe 的 readability handler 和 termination handler 都在同一个 run loop dispatch queue 上触发,不会产生数据竞争。Bash 工具的 annotations 设置了 destructiveHint: true,明确告诉 LLM 这个工具有破坏性。
Advanced 层的工具开始需要外部依赖了——AgentTool 需要 agentSpawner,Task* 系列需要 taskStore,SendMessage 需要 mailboxStore 和 teamStore。
Agent 工具是这一层的代表。它的作用是让 LLM 能"派出一个子 Agent"去完成复杂任务:
public func createAgentTool() -> ToolProtocol {
return defineTool(
name: "Agent",
description: "Launch a subagent to handle complex, multi-step tasks autonomously.",
inputSchema: agentToolSchema,
isReadOnly: false
) { (input: AgentToolInput, context: ToolContext) async throws -> ToolExecuteResult in
guard let spawner = context.agentSpawner else {
return ToolExecuteResult(
content: "Error: Agent spawner not available.",
isError: true
)
}
// 解析内置 Agent 类型、权限模式,然后 spawn 子 Agent
let result = await spawner.spawn(
prompt: input.prompt,
model: input.model ?? agentDef?.model,
systemPrompt: agentDef?.systemPrompt,
allowedTools: agentDef?.tools,
...
)
return ToolExecuteResult(content: result.text, isError: result.isError)
}
}
AgentTool 的输入支持 11 个字段:prompt、description、subagent_type、model、name、maxTurns、run_in_background、isolation、team_name、mode、resume。其中 subagent_type 可以指定内置的 Explore 或 Plan 类型,也可以用自定义名称。
注意 agentSpawner 是通过 ToolContext 注入的协议类型——AgentTool 不知道子 Agent 是怎么创建的,它只调 spawner.spawn(),具体实现由 Core 层注入。这种依赖倒置让工具层完全不用 import Core 模块。
Specialist 层的工具依赖更重——它们各自需要一个专属 Store,而且功能高度领域化。
CronTools 是一组三个工具:CronCreate、CronDelete、CronList,通过 context.cronStore 访问定时任务存储:
public func createCronCreateTool() -> ToolProtocol {
return defineTool(
name: "CronCreate",
description: "Create a scheduled recurring task (cron job).",
inputSchema: cronCreateSchema,
isReadOnly: false
) { (input: CronCreateInput, context: ToolContext) async throws -> ToolExecuteResult in
guard let cronStore = context.cronStore else {
return ToolExecuteResult(content: "Error: CronStore not available.", isError: true)
}
let job = await cronStore.create(
name: input.name,
schedule: input.schedule,
command: input.command
)
return ToolExecuteResult(
content: "Cron job created: \(job.id) \"\(job.name)\"",
isError: false
)
}
}
三个工具都用 guard let cronStore = context.cronStore 做前置检查——如果 Store 没注入,直接返回错误而不是崩溃。
LSP 工具是另一个有趣的例子。它用 grep 模拟 Language Server Protocol 的常见操作(跳转定义、查找引用、符号搜索),完全不依赖真正的语言服务器:
case "goToDefinition", "goToImplementation":
// 1. 用正则提取光标位置的符号名
guard let symbol = getSymbolAtPosition(
filePath: filePath, line: line, character: character
) else { ... }
// 2. grep 搜索定义模式
let pattern = "(func|class|struct|enum|protocol|typealias|let|var|export)\\s+\(symbol)"
let results = await runGrep(
arguments: ["grep", "-rn", "-E", pattern, cwd],
cwd: cwd
)
LSP 工具只依赖 context.cwd,不需要任何 Store——属于 Specialist 层里最轻量的工具。
SDK 提供了 defineTool 工厂函数,让开发者用最少的代码创建符合 ToolProtocol 的工具。它有四个重载,覆盖不同的使用场景。
最常用的重载接受一个 Codable 输入类型和一个返回 String 的闭包:
let greetTool = defineTool(
name: "Greet",
description: "Generate a greeting message.",
inputSchema: [
"type": "object",
"properties": [
"name": ["type": "string", "description": "Person's name"]
],
"required": ["name"]
],
isReadOnly: true
) { (input: GreetInput, context: ToolContext) async throws -> String in
return "Hello, \(input.name)!"
}
// 输入类型只需要遵循 Codable
struct GreetInput: Codable {
let name: String
}
defineTool 内部做了四件事:
Any 类型 cast 成 [String: Any]JSONSerialization 序列化成 DataJSONDecoder 解码成你定义的 Input 类型任何一步失败(输入不是字典、JSON 序列化失败、解码失败、闭包抛异常),都会返回 isError: true 的结果,不会炸掉 Agent Loop。这意味着你可以放心地用 try 在闭包里抛错误,它们会被妥善捕获。
如果工具需要显式标记错误(而不是用 try 抛异常),用返回 ToolExecuteResult 的重载:
let divideTool = defineTool(
name: "Divide",
description: "Divide two numbers.",
inputSchema: [
"type": "object",
"properties": [
"a": ["type": "number"],
"b": ["type": "number"]
],
"required": ["a", "b"]
]
) { (input: DivideInput, context: ToolContext) async throws -> ToolExecuteResult in
guard input.b != 0 else {
return ToolExecuteResult(content: "Error: Division by zero.", isError: true)
}
return ToolExecuteResult(content: "\(input.a / input.b)", isError: false)
}
内置工具大多用这个重载,因为很多错误是逻辑层面的(文件不存在、Store 没注入),不适合用异常表示。
有些工具不需要输入参数(比如列表操作、健康检查),用无输入重载:
let listTool = defineTool(
name: "ListItems",
description: "List all items.",
inputSchema: ["type": "object", "properties": [:]]
) { (context: ToolContext) async throws -> String in
return "No items found."
}
闭包只接收 ToolContext,完全忽略输入。
最后一个重载跳过 Codable 解码,直接把原始 [String: Any] 字典传给闭包。适用于输入字段类型不固定的场景——比如 ConfigTool 的 value 字段可以是字符串、数字、布尔值、数组、对象或 null:
let configTool = defineTool(
name: "Config",
description: "Read or write configuration values.",
inputSchema: configSchema
) { (input: [String: Any], context: ToolContext) async -> ToolExecuteResult in
let key = input["key"] as? String ?? ""
let value = input["value"] // 任意类型
// ...
}
LLM 发来的 JSON 字段名通常用 snake_case(比如 file_path、run_in_background),但 Swift 的惯用命名是 camelCase。输入类型通过 CodingKeys 枚举做映射:
private struct BashInput: Codable {
let command: String
let runInBackground: Bool?
private enum CodingKeys: String, CodingKey {
case command
case runInBackground = "run_in_background"
}
}
这是 Swift Codable 的标准做法——defineTool 内部的 JSONDecoder 会自动用 CodingKeys 做字段名转换。
工具不是直接一股脑丢给 LLM 的。SDK 有一套组装和过滤机制。
assembleToolPool 把三类工具来源合并成一个去重后的工具池:
public func assembleToolPool(
baseTools: [ToolProtocol], // SDK 内置工具
customTools: [ToolProtocol]?, // 用户自定义工具
mcpTools: [ToolProtocol]?, // MCP 服务器提供的工具
allowed: [String]?,
disallowed: [String]?
) -> [ToolProtocol] {
// 1. 合并所有来源:base + custom + MCP
var combined = baseTools
if let customTools { combined.append(contentsOf: customTools) }
if let mcpTools { combined.append(contentsOf: mcpTools) }
// 2. 按名称去重(后者覆盖前者)
var byName = [String: ToolProtocol]()
for tool in combined {
byName[tool.name] = tool
}
// 3. 应用过滤规则
return filterTools(
tools: Array(byName.values),
allowed: allowed,
disallowed: disallowed
)
}
去重用 Dictionary,遍历过程中同名的后者会覆盖前者。这意味着优先级是:MCP > 自定义 > 内置——用户可以用自定义工具或 MCP 工具替换同名内置工具。
filterTools 实现白名单/黑名单过滤:
public func filterTools(
tools: [ToolProtocol],
allowed: [String]?, // 白名单,nil 或空表示不过滤
disallowed: [String]? // 黑名单,nil 或空表示不过滤
) -> [ToolProtocol] {
var filtered = tools
// 先应用白名单
if let allowed, !allowed.isEmpty {
let allowedSet = Set(allowed)
filtered = filtered.filter { allowedSet.contains($0.name) }
}
// 再应用黑名单(黑名单优先于白名单)
if let disallowed, !disallowed.isEmpty {
let disallowedSet = Set(disallowed)
filtered = filtered.filter { !disallowedSet.contains($0.name) }
}
return filtered
}
两个规则同时存在时,黑名单优先——即使一个工具在白名单里,只要出现在黑名单里也会被排除。
ToolRestrictionStack 是一个栈结构,用于 Skills 系统中控制工具可见范围。当一个 Skill 配置了 toolRestrictions 时,执行前 push 限制,执行后 pop 恢复:
let stack = ToolRestrictionStack()
stack.push([.bash, .read]) // Skill A:只能用 Bash 和 Read
stack.push([.grep, .glob]) // Skill B(嵌套):只能用 Grep 和 Glob
// 此时 currentAllowedToolNames 只返回 Grep 和 Glob
stack.pop() // Skill B 完成 → 回到 Bash 和 Read
stack.pop() // Skill A 完成 → 恢复全部工具
栈的 LIFO 特性保证了嵌套 Skill 的正确行为——内层 Skill 的限制覆盖外层,退出后自动恢复。线程安全通过内部串行 DispatchQueue 保证。
currentAllowedToolNames 的逻辑很简单:栈空就返回全部工具,栈非空就只返回栈顶限制列表里的工具名。
最后一步是把工具转成 Anthropic API 要求的格式:
public func toApiTool(_ tool: ToolProtocol) -> [String: Any] {
var result: [String: Any] = [
"name": tool.name,
"description": tool.description,
"input_schema": tool.inputSchema
]
if let annotations = tool.annotations {
result["annotations"] = [
"readOnlyHint": annotations.readOnlyHint,
"destructiveHint": annotations.destructiveHint,
"idempotentHint": annotations.idempotentHint,
"openWorldHint": annotations.openWorldHint
]
}
return result
}
annotations 只在有值时才包含——省点 token。
把上面说的一切串起来,写一个能直接跑的自定义工具——获取天气:
import Foundation
import OpenAgentSDK
// 1. 定义输入类型
struct WeatherInput: Codable {
let city: String
let unit: String? // "celsius" or "fahrenheit"
private enum CodingKeys: String, CodingKey {
case city, unit
}
}
// 2. 用 defineTool 创建工具
let weatherTool = defineTool(
name: "Weather",
description: "Get current weather for a city.",
inputSchema: [
"type": "object",
"properties": [
"city": [
"type": "string",
"description": "City name, e.g. 'Beijing'"
],
"unit": [
"type": "string",
"enum": ["celsius", "fahrenheit"],
"description": "Temperature unit, defaults to celsius"
]
],
"required": ["city"]
],
isReadOnly: true,
annotations: ToolAnnotations(
readOnlyHint: true,
destructiveHint: false,
openWorldHint: true // 要访问外部 API
)
) { (input: WeatherInput, context: ToolContext) async throws -> ToolExecuteResult in
let unit = input.unit ?? "celsius"
// 调用天气 API(这里省略具体实现)
let weather = try await fetchWeather(city: input.city, unit: unit)
return ToolExecuteResult(content: weather, isError: false)
}
// 3. 注册到 Agent
let agent = createAgent(options: AgentOptions(
apiKey: "sk-...",
model: "claude-sonnet-4-6",
customTools: [weatherTool] // 自定义工具自动加入工具池
))
这个工具会被 assembleToolPool 和内置工具合并、去重、过滤后发给 LLM。LLM 看到工具定义后,在需要查天气时会自动调用它。defineTool 内部的 Codable 桥接会把 LLM 返回的 JSON 自动解码成 WeatherInput,你不需要手动处理任何 JSON 解析。
工具系统的设计思路可以概括为几个关键词:
协议驱动。ToolProtocol 只规定工具的形状(名字、描述、输入 schema、执行方法),不规定工具怎么实现。这让内置工具和自定义工具走完全一样的代码路径。
依赖注入。ToolContext 的 20+ 个可选字段看着多,但每个工具只看自己需要的字段,其余全是 nil。AgentTool 不知道 CronStore 的存在,CronCreate 不知道 SubAgentSpawner 的存在。
分层组织。Core/Advanced/Specialist 三层不是代码分层(它们的代码结构完全一样),而是按依赖复杂度划分。Core 层的工具可以独立运行,Advanced 层需要 Store,Specialist 层需要更专业的领域设施。
容错优先。defineTool 内部把所有可能的失败点(类型转换、序列化、解码、执行)都包在 do/catch 里,任何环节出错都返回 isError: true 而不是 crash。Agent Loop 里工具错误不会传播,LLM 拿到错误信息后可以换策略。
下一篇来看 MCP 集成:SDK 怎么连接外部工具服务器、怎么把 MCP 工具转成 ToolProtocol、怎么在 Agent Loop 里和内置工具共存。
系列文章:
GitHub:terryso/open-agent-sdk-swift
本文是「深入 Open Agent SDK (Swift)」系列第一篇。
大多数 LLM 封装库做的事情是:发请求、拿响应、结束。但一个真正的 Agent 不止于此——它要能自己判断需不需要调工具、执行完工具后把结果喂回 LLM、循环往复直到拿到最终答案。这个循环就是 Agent Loop。
这篇文章分析 Open Agent SDK (Swift) 的 Agent Loop 实现,看它怎样用原生 Swift 并发在进程内跑完一整套循环。
用一句话概括:**用户发 prompt → LLM 返回响应 → 如果 LLM 要求调工具就执行 → 把工具结果喂回 LLM → 重复,直到 LLM 说"我说完了"**。
画成流程图:
flowchart TD
A["用户 prompt"] --> B["构建 messages + tools"]
B --> C["调用 LLM API"]
C -->|end_turn / stop_sequence| D["返回结果"]
C -->|max_tokens| C2["追加'请继续'"]
C2 --> C
C -->|tool_use| E["提取 tool_use blocks"]
E --> F["按只读/变更分桶"]
F --> G["只读工具并发执行"]
F --> H["变更工具串行执行"]
G --> I["微压缩大结果"]
H --> I
I --> J["tool_result 加入 messages"]
J --> C
这个循环里有几个关键决策点:
end_turn 或 stop_sequence 时正常结束;到达 maxTurns 上限时强制停止;超出预算 (maxBudgetUsd) 时中断;用户主动取消时也中断。SDK 提供两种方式触发 Agent Loop:
let agent = createAgent(options: AgentOptions(
apiKey: "sk-...",
model: "claude-sonnet-4-6",
maxTurns: 10
))
let result = await agent.prompt("Read Package.swift and summarize it.")
print(result.text)
print("Turns: \(result.numTurns), Cost: $\(String(format: "%.4f", result.totalCostUsd))")
prompt() 是"发出去等结果"模式。一次调用跑完所有轮次,返回最终的 QueryResult。适合不需要实时看到中间过程的场景——比如后台任务、CLI 工具。
for await message in agent.stream("Explain this codebase.") {
switch message {
case .partialMessage(let data):
print(data.text, terminator: "") // 实时输出文本
case .toolUse(let data):
print("[Using tool: \(data.toolName)]")
case .toolResult(let data):
print("[Tool done, \(data.content.count) chars]")
case .result(let data):
print("\nDone: \(data.numTurns) turns, $\(String(format: "%.4f", data.totalCostUsd))")
default:
break
}
}
stream() 返回 AsyncStream<SDKMessage>,在 LLM 处理过程中持续推送事件。SDK 定义了 17 种消息类型,从 partialMessage(文本片段)到 toolUse(工具调用)到 result(最终结果),覆盖了 Agent Loop 的每个阶段。
选择哪种取决于你的 UI 需求:要实时展示就用 stream(),不需要就用 prompt()。
不管走哪条入口,每个 turn 的核心逻辑是相同的。让我们跟一遍代码。
if shouldAutoCompact(messages: messages, model: model, state: compactState) {
let (newMessages, _, newState) = await compactConversation(
client: client, model: model,
messages: messages, state: compactState,
fileCache: fileCache,
sessionMemory: sessionMemory
)
messages = newMessages
compactState = newState
}
每个 turn 开始前先检查:消息历史估计的 token 数是不是快要撑爆上下文窗口了。如果是,用一个 LLM 调用把历史压缩成摘要,替换掉原始消息。
压缩的阈值是 模型上下文窗口 - 10000 tokens(缓冲区)。连续压缩失败 3 次后会停止尝试,避免浪费 token。
response = try await withRetry({
try await client.sendMessage(
model: model, messages: messages,
maxTokens: maxTokens, system: buildSystemPrompt(),
tools: apiTools, ...
)
}, retryConfig: retryConfig)
所有 LLM 请求都经过 withRetry 包装,按配置的重试策略处理临时错误(网络超时、429 限流等)。
如果主模型彻底失败,还配置了 fallbackModel,SDK 会用备用模型再试一次:
if let fallbackModel = self.options.fallbackModel, fallbackModel != self.model {
// 用 fallbackModel 重试...
}
LLM 响应里的 stop_reason 决定了循环的走向:
| stop_reason | 含义 | 循环行为 |
|---|---|---|
end_turn |
LLM 说完了 | 正常退出循环 |
stop_sequence |
碰到停止符 | 正常退出循环 |
tool_use |
LLM 想调工具 | 执行工具,继续循环 |
max_tokens |
输出被截断 | 追加"请继续",继续循环 |
max_tokens 的情况有个保护:最多自动续接 3 次,防止无限循环。
当 LLM 返回 tool_use 时,SDK 不是简单地把工具排着队一个个跑,而是做了分桶:
// ToolExecutor.partitionTools()
for block in blocks {
let tool = tools.first { $0.name == block.name }
if let tool = tool, tool.isReadOnly {
readOnly.append(item) // 只读桶
} else {
mutations.append(item) // 变更桶
}
}
只读工具(Read、Glob、Grep、WebSearch 等)可以安全并发,用 TaskGroup 跑,最多 10 个一批:
let batchResults = await withTaskGroup(of: ToolResult.self) { group in
for item in batchSlice {
group.addTask {
await executeSingleTool(block: item.block, tool: item.tool, context: ...)
}
}
// 收集结果
}
变更工具(Write、Edit、Bash 等)必须串行执行,一个跑完再跑下一个,避免并发写冲突:
for item in items {
let result = await executeSingleTool(...)
results.append(result)
}
执行顺序:先跑所有只读工具(并发),再跑所有变更工具(串行)。这在 LLM 一次返回多个工具调用时能显著提升性能——比如 LLM 同时要求读 5 个文件,5 个读操作并行完成。
工具执行完后,结果在喂回 LLM 之前还要过一道微压缩:
for result in toolResults {
let processedContent = await processToolResult(result.content, isError: result.isError)
processedResults.append(ToolResult(
toolUseId: result.toolUseId,
content: processedContent,
isError: result.isError
))
}
如果一个工具返回的内容超过 50000 字符(比如读了一个大文件),SDK 会用一次额外的 LLM 调用把内容压缩。错误结果不压缩——保留了完整的错误信息供 LLM 诊断。
每一轮 LLM 调用后,SDK 都会更新 token 用量和费用:
let turnCost = estimateCost(model: model, usage: turnUsage)
totalCostUsd += turnCost
costByModel[model] = CostBreakdownEntry(
model: model,
inputTokens: turnUsage.inputTokens,
outputTokens: turnUsage.outputTokens,
costUsd: turnCost
)
costByModel 按 model 分组记录。这意味着如果你中途切换了模型(通过 switchModel()),每个模型的费用是分开计算的。最终 result.costBreakdown 能告诉你每个模型花了多少钱。
预算检查在每个 turn 后执行:
if let budget = options.maxBudgetUsd, totalCostUsd > budget {
status = .errorMaxBudgetUsd
break
}
超出预算时立即退出循环,但已产生的文本会保留在结果里——你拿到的是部分结果,不是空白的。
Swift 的结构化并发用 Task.isCancelled 做协作式取消。SDK 在循环的多个检查点都检查了这个标志:
// 循环入口
if Task.isCancelled || _interrupted {
status = .cancelled
break
}
// 只读/变更之间
if Task.isCancelled { return results }
stream() 还额外支持通过 interrupt() 方法取消——内部就是 cancel 掉持有 stream 的 Task。
取消后返回的是 QueryResult(isCancelled: true),附带截止到取消时刻的部分文本和 token 用量。
SDK 的错误处理原则是:工具执行错误不传播,API 错误有重试,最终失败保留部分结果。
工具执行时,任何错误都被捕获为 ToolResult(isError: true):
static func executeSingleTool(...) async -> ToolResult {
guard let tool = tool else {
return ToolResult(toolUseId: block.id, content: "Error: Unknown tool", isError: true)
}
// ... try executing
let result = await tool.call(input: block.input, context: context)
return ToolResult(toolUseId: block.id, content: result.content, isError: result.isError)
}
工具报错的结果照样喂回 LLM,LLM 看到错误信息后可以决定换个策略。Agent Loop 不会因为一个工具挂了就崩溃。
API 层面的错误(网络问题、500 等)会触发重试;重试失败后触发 fallback 模型;全挂了才返回 errorDuringExecution 状态。
Agent Loop 在关键节点触发 Hook 事件:
| Hook 事件 | 触发时机 |
|---|---|
sessionStart |
循环开始前 |
preToolUse |
每个工具执行前 |
postToolUse |
工具成功执行后 |
postToolUseFailure |
工具执行失败后 |
stop |
循环结束时(正常或异常) |
sessionEnd |
返回结果前 |
Hook 的一个典型用法是在 preToolUse 拦截危险操作:
await hookRegistry.register(.preToolUse, definition: HookDefinition(
matcher: "Bash",
handler: { input in
return HookOutput(message: "Bash blocked in production", block: true)
}
))
被 Hook 拦截的工具不会执行,而是返回一个错误结果——LLM 会看到"Bash blocked in production",可以换个方式完成任务。
除了 prompt() 和 stream(),SDK 还提供了第三种入口——streamInput(),接受一个 AsyncStream<String> 作为输入:
let input = AsyncStream<String> { continuation in
continuation.yield("What's in this project?")
continuation.yield("Now explain the test structure.")
continuation.finish()
}
for await message in agent.streamInput(input) {
// 处理每条输入对应的响应
}
每个输入元素被视为一条新的用户消息,触发一个完整的 prompt 周期。这适合聊天式交互:用户的每条消息都是输入流的一个元素,Agent 逐条处理并流式输出。
Agent Loop 是整个 SDK 的心脏。理解了它的工作方式,剩下的功能都是在它的基础上叠加的:
下一篇我们深入 工具系统:34 个内置工具怎么组织、ToolProtocol 协议的设计思路、以及怎么用 defineTool 创建自定义工具。
系列文章:
GitHub:terryso/open-agent-sdk-swift
如果你是一名 Swift 开发者,想要在自己的 macOS 应用中集成 AI Agent 能力,选择并不多。大多数 Agent 框架都是 Python 或 TypeScript 的,Swift 生态几乎没有成熟的解决方案。Open Agent SDK (Swift) 正是为了填补这个空白而生的。
Open Agent SDK 用 Swift 6.1 编写,要求 macOS 13+。它在进程内跑完整个 Agent Loop:发送提示、解析响应、执行工具调用、把结果喂回 LLM,循环往复直到拿到最终答案。全程用原生 Swift 并发(async/await、AsyncStream)驱动。
项目灵感来自 open-agent-sdk-typescript,把同样的 Agent 架构搬到了 Swift 生态。同系列还有 Go 版本。
安装只需在 Package.swift 中添加依赖:
dependencies: [
.package(url: "https://github.com/terryso/open-agent-sdk-swift.git", from: "0.1.0")
]
几行代码就能跑起一个 Agent:
import OpenAgentSDK
let agent = createAgent(options: AgentOptions(
apiKey: "sk-...",
model: "claude-sonnet-4-6",
systemPrompt: "You are a helpful assistant.",
maxTurns: 10
))
let result = await agent.prompt("Explain Swift concurrency in one paragraph.")
print(result.text)
print("Used \(result.usage.inputTokens) input + \(result.usage.outputTokens) output tokens")
prompt() 是阻塞式的,一次调用完成整个 Agent Loop。如果需要流式输出,用 stream():
for await message in agent.stream("Read Package.swift and summarize it.") {
switch message {
case .partialMessage(let data):
print(data.text, terminator: "")
case .toolUse(let data):
print("Using tool: \(data.toolName)")
case .result(let data):
print("\nDone (\(data.numTurns) turns, $\(String(format: "%.4f", data.totalCostUsd)))")
default:
break
}
}
你的应用 (import OpenAgentSDK)
└── Agent (prompt() / stream())
└── Agentic Loop (API 调用 → 工具执行 → 重复)
├── LLMClient Protocol (AnthropicClient / OpenAIClient)
├── 34 个内置工具
├── MCP 服务器集成
├── Session Store (JSON 持久化)
└── Hook Registry (20+ 生命周期事件)
defineTool() 自定义工具,输入走 Codable 自动解码。SDK 附带 31 个示例项目,覆盖基本用法、流式输出、自定义工具、MCP 集成、会话管理、多 Agent 协作、权限控制、沙盒、模型切换等场景。代码分为 API、Core、Hooks、MCP、Skills、Stores、Tools、Types、Utils 九个模块,约 90 个 Swift 源文件,MIT 许可证。
本系列后续文章会逐一深入每个子系统的实现细节。
深入 Open Agent SDK 系列文章:
GitHub:terryso/open-agent-sdk-swift
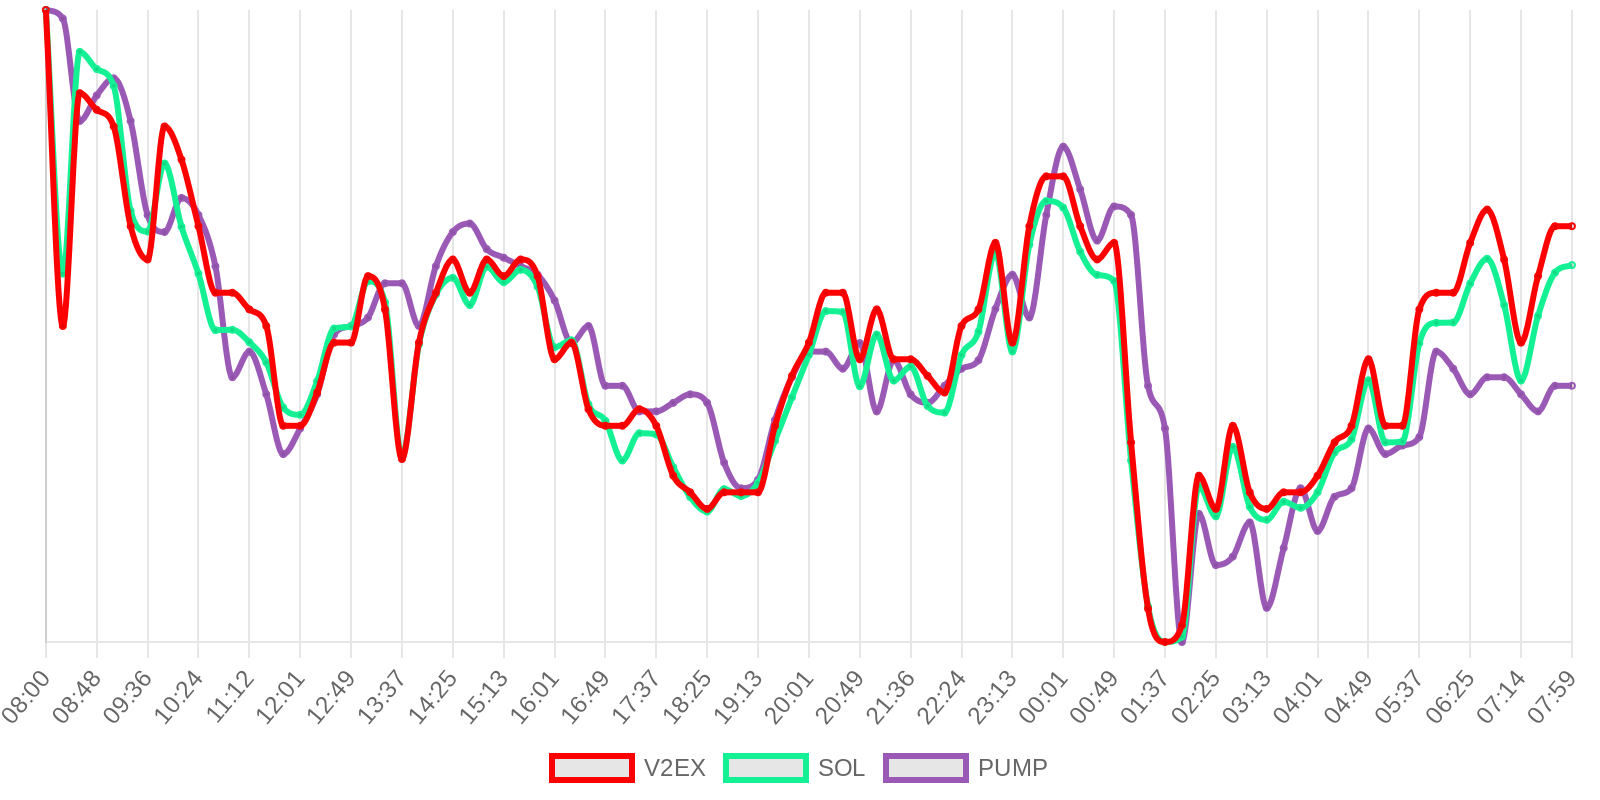
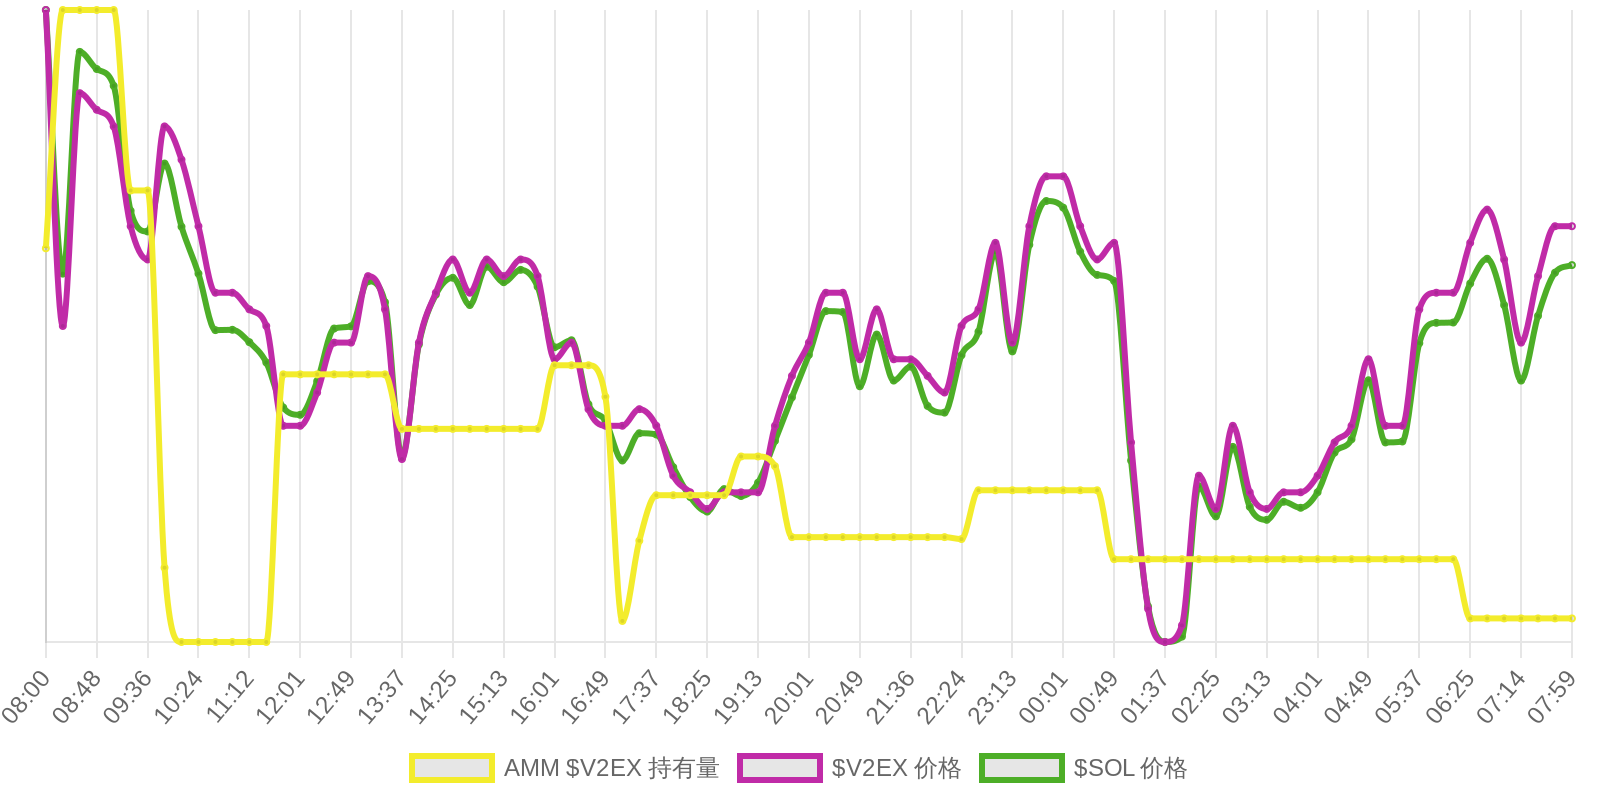
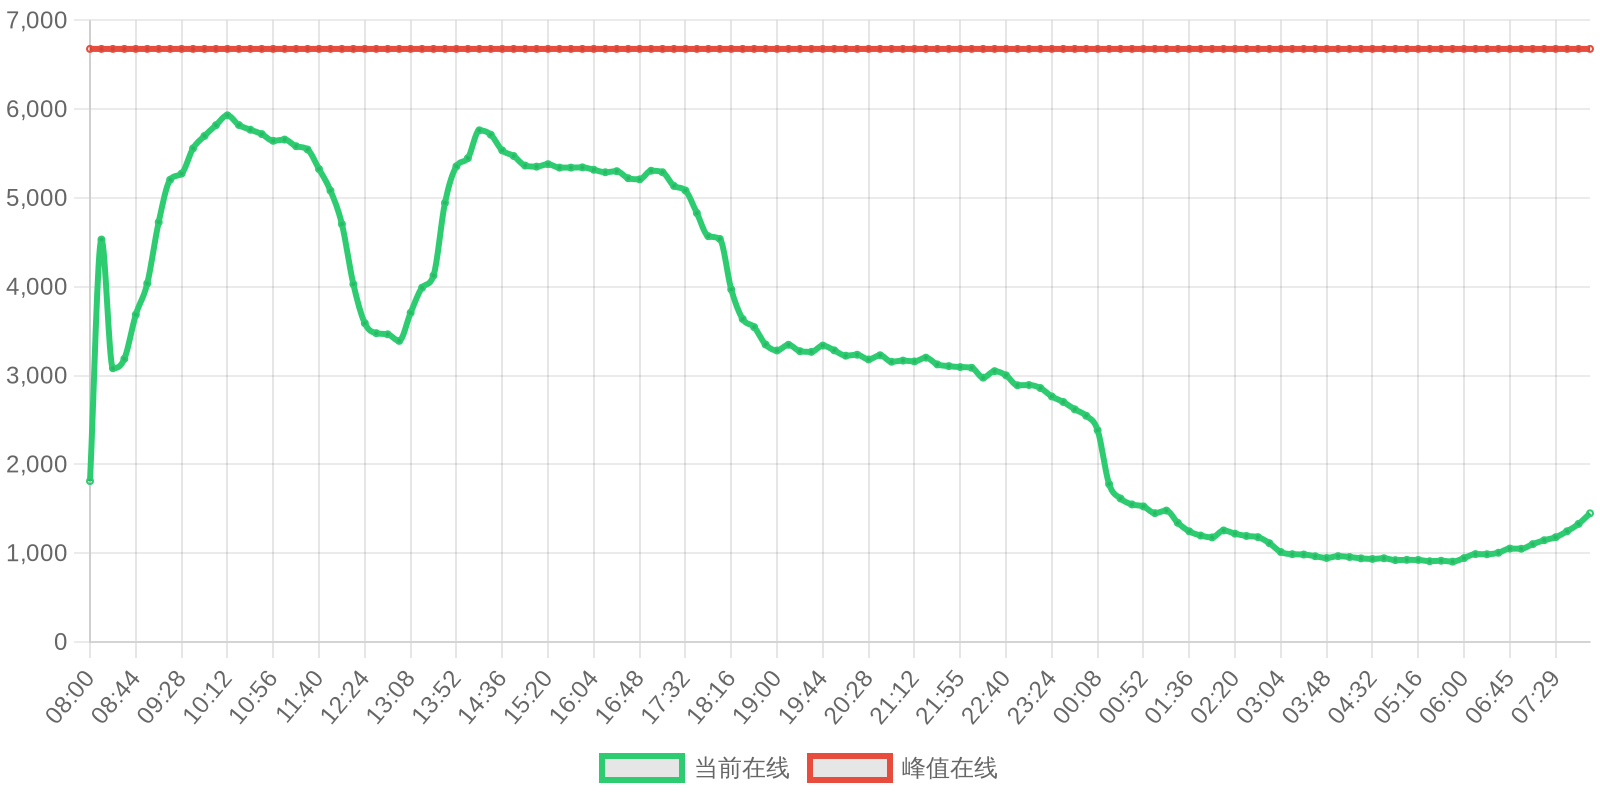
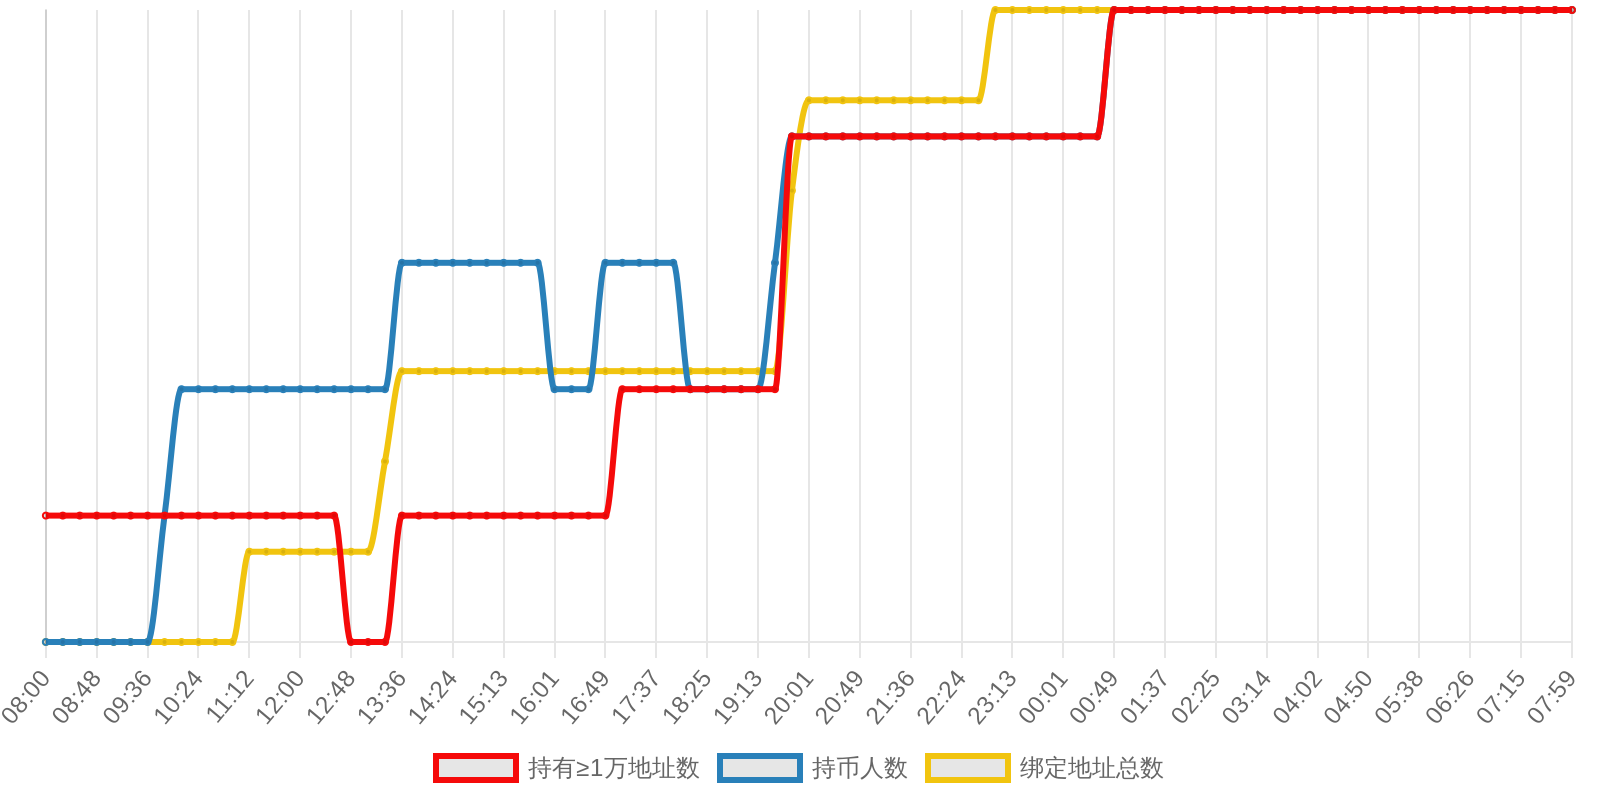
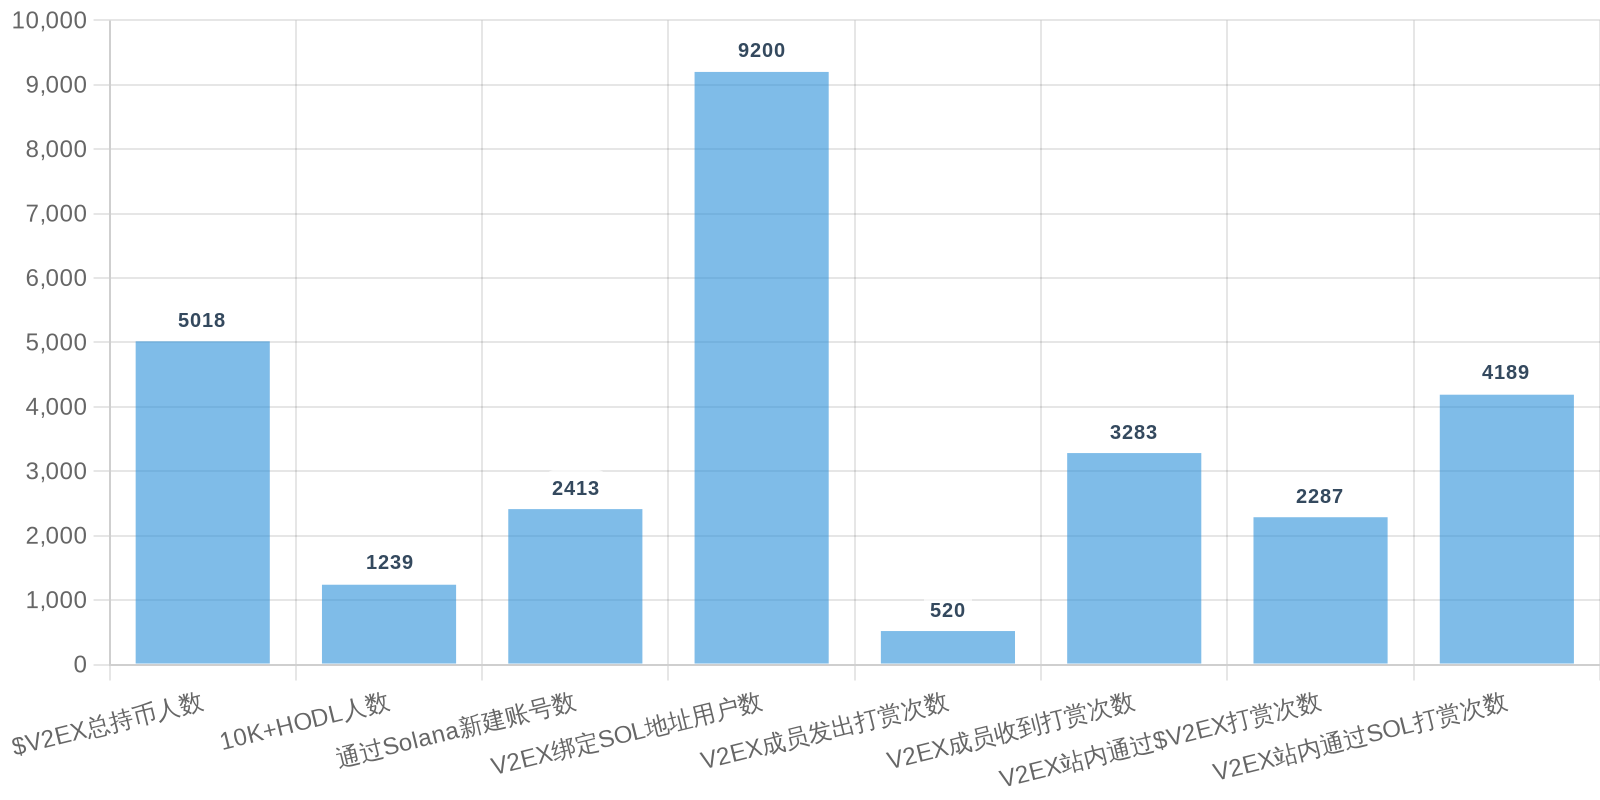
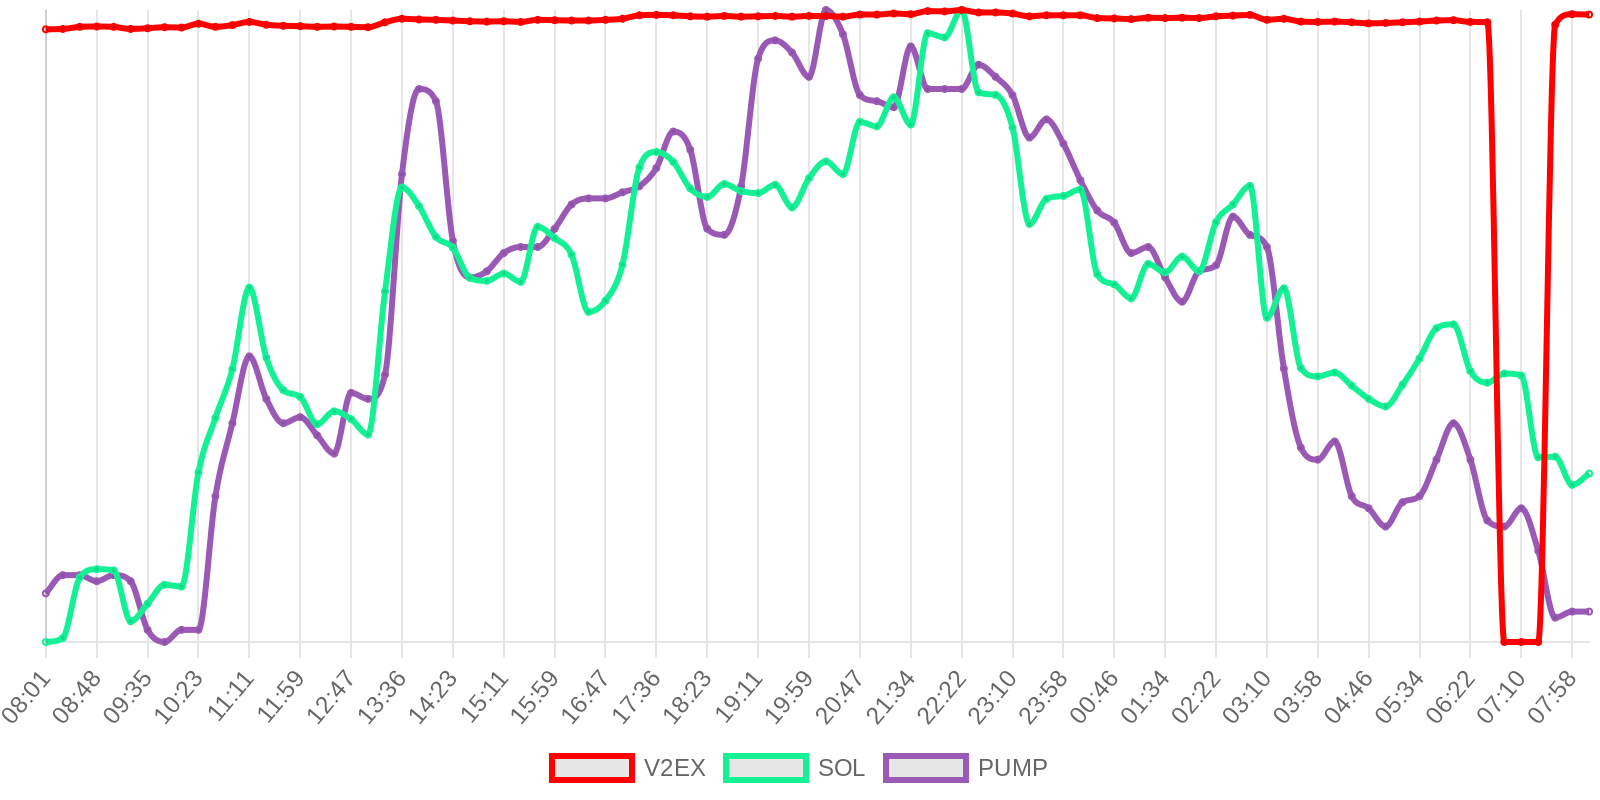
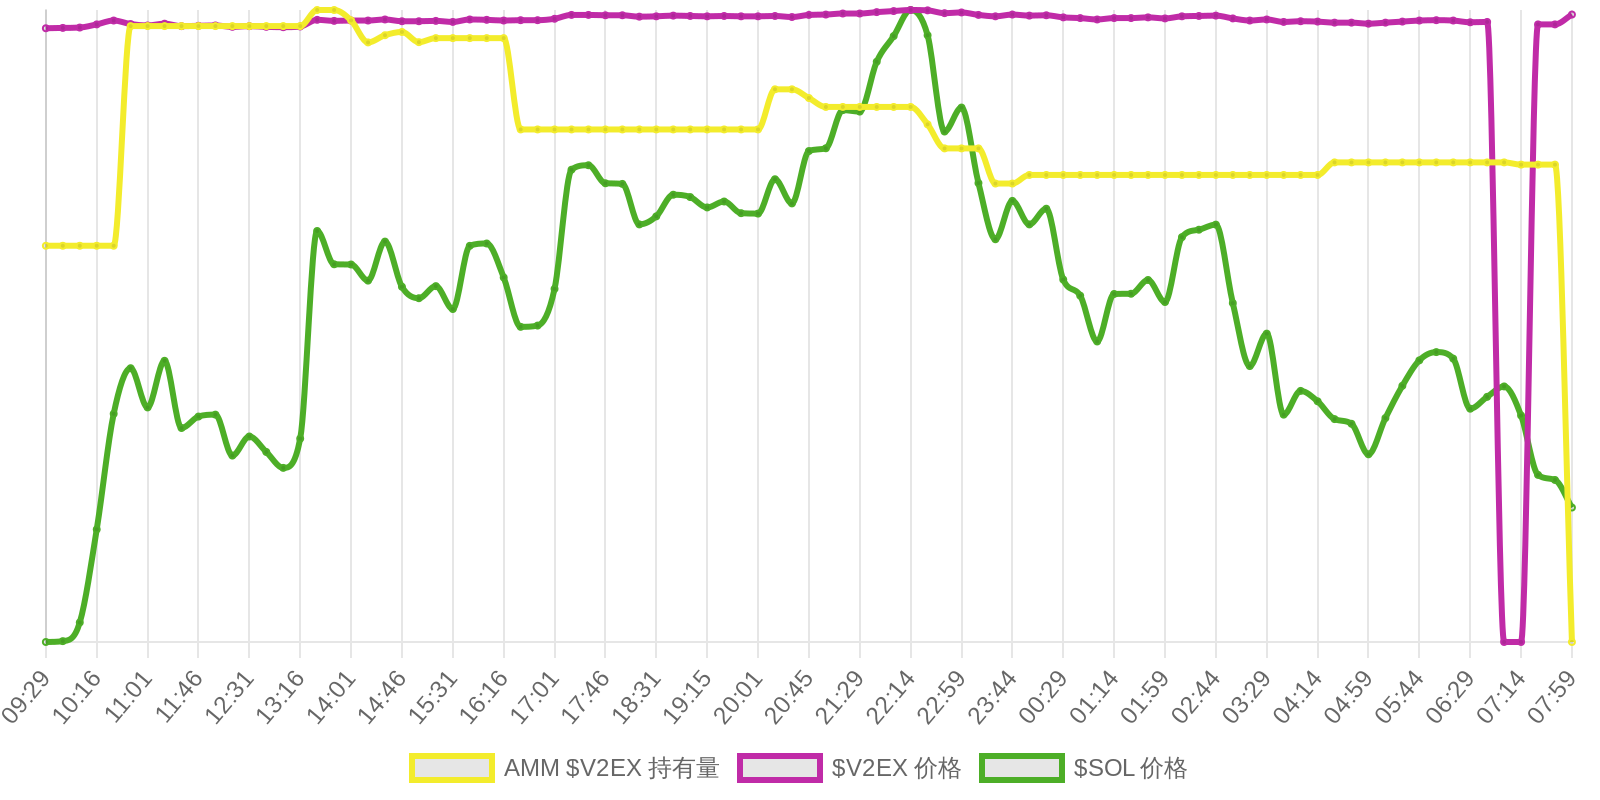
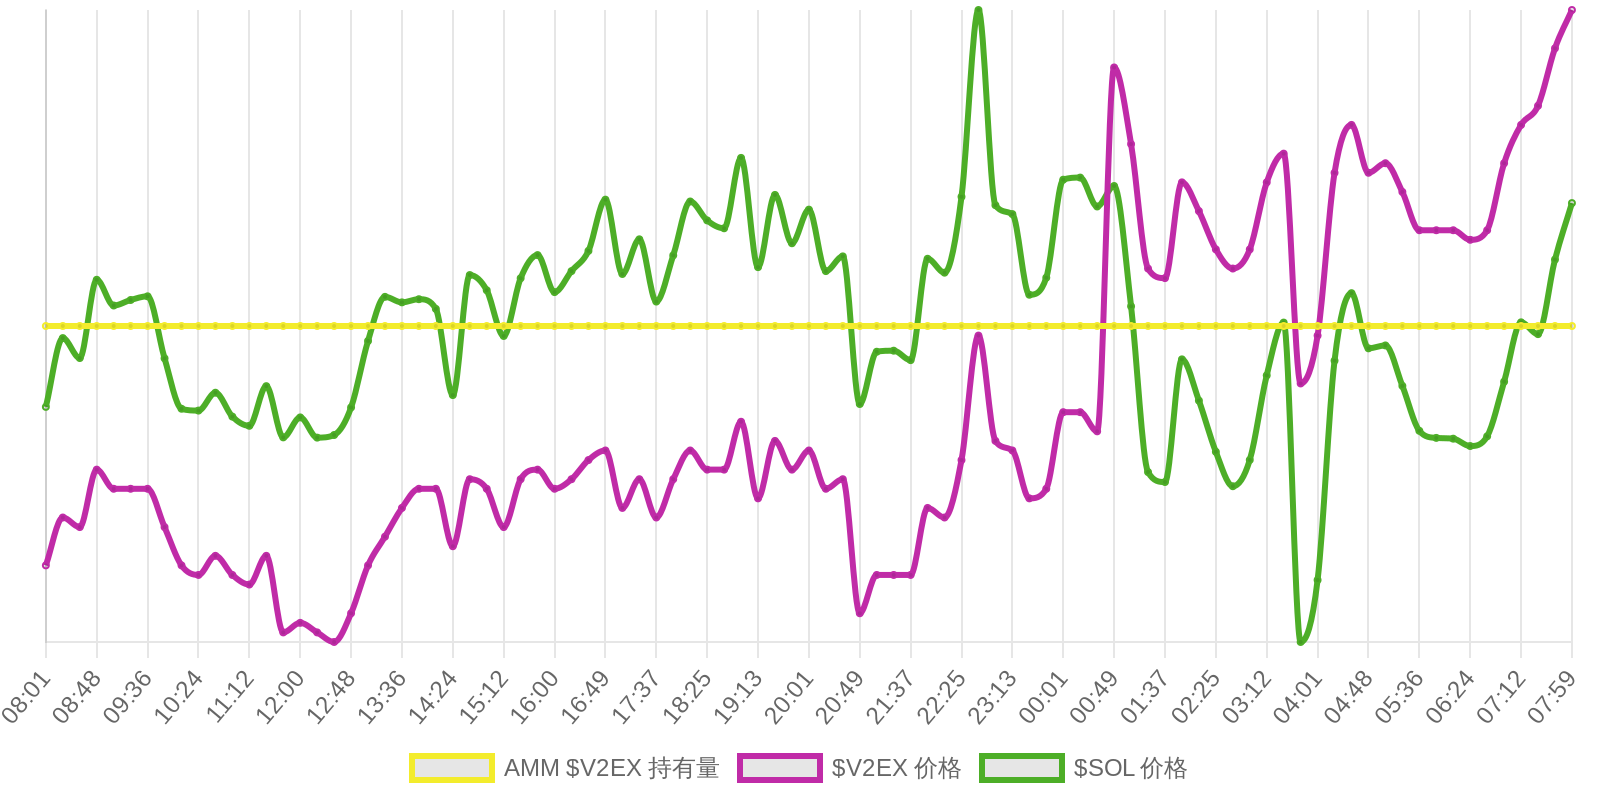
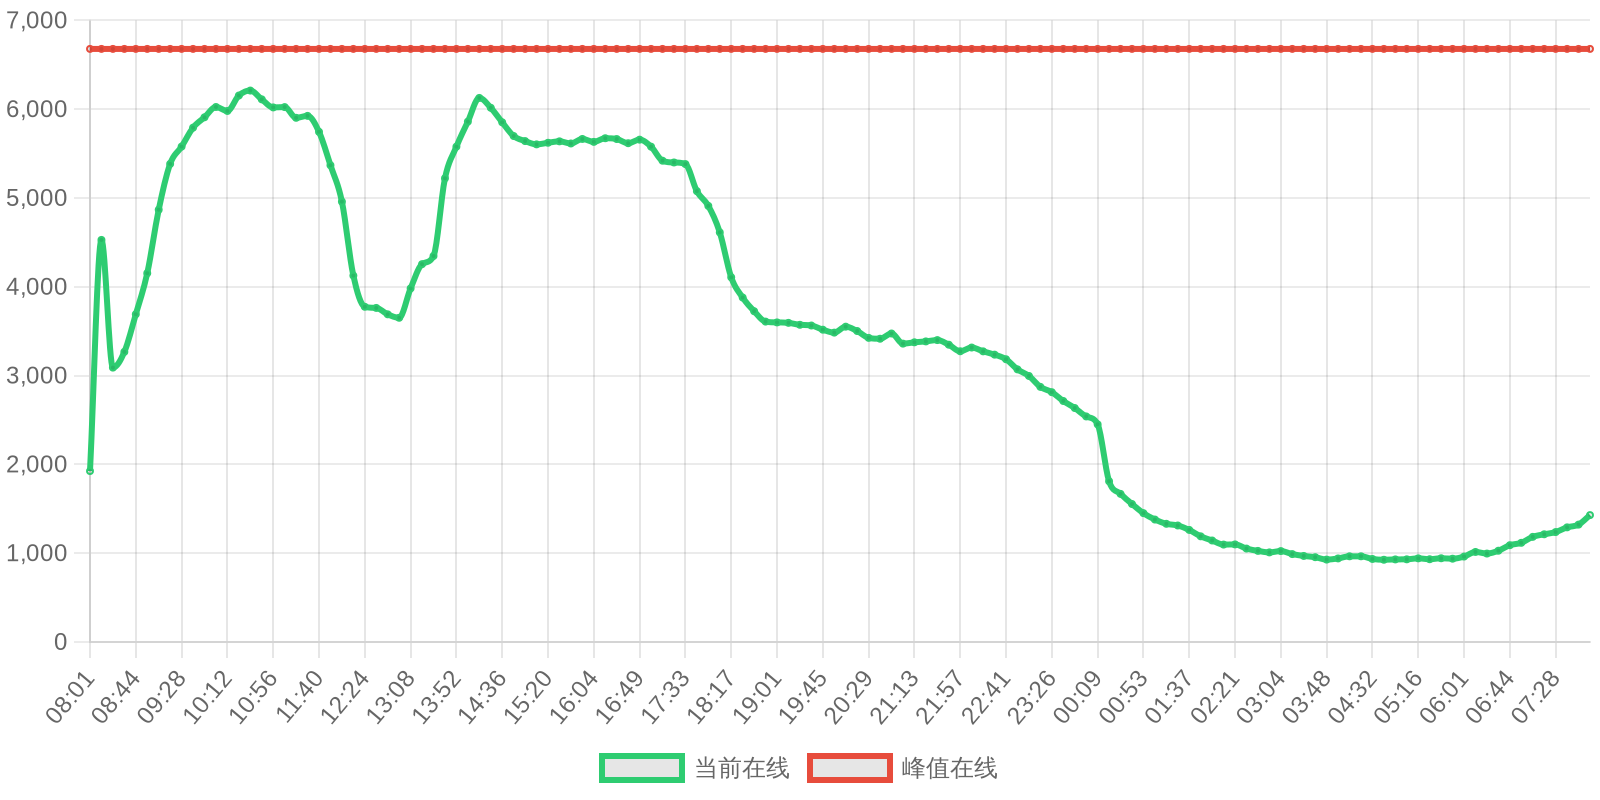
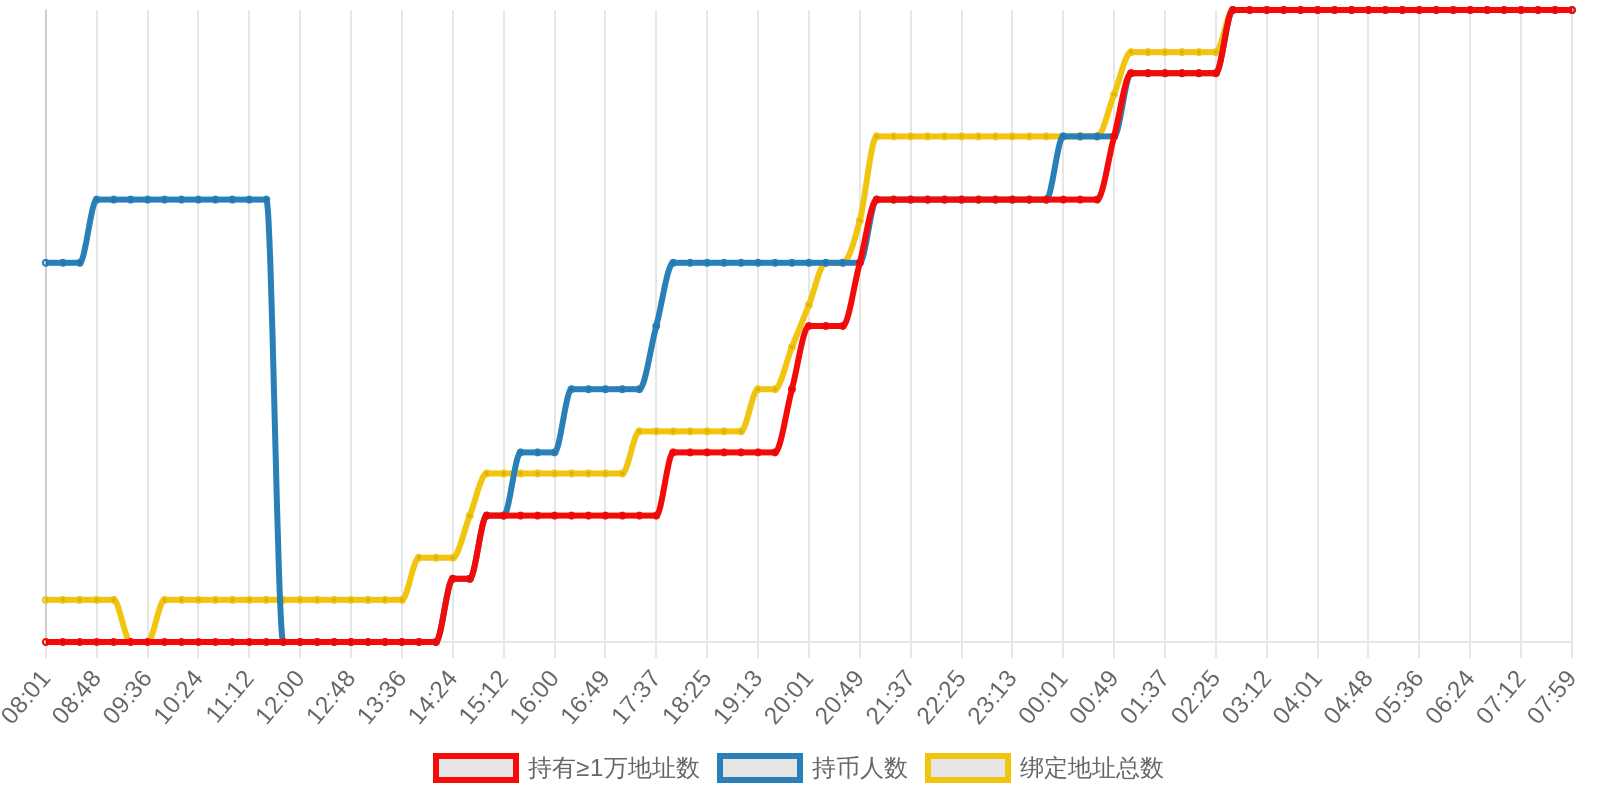
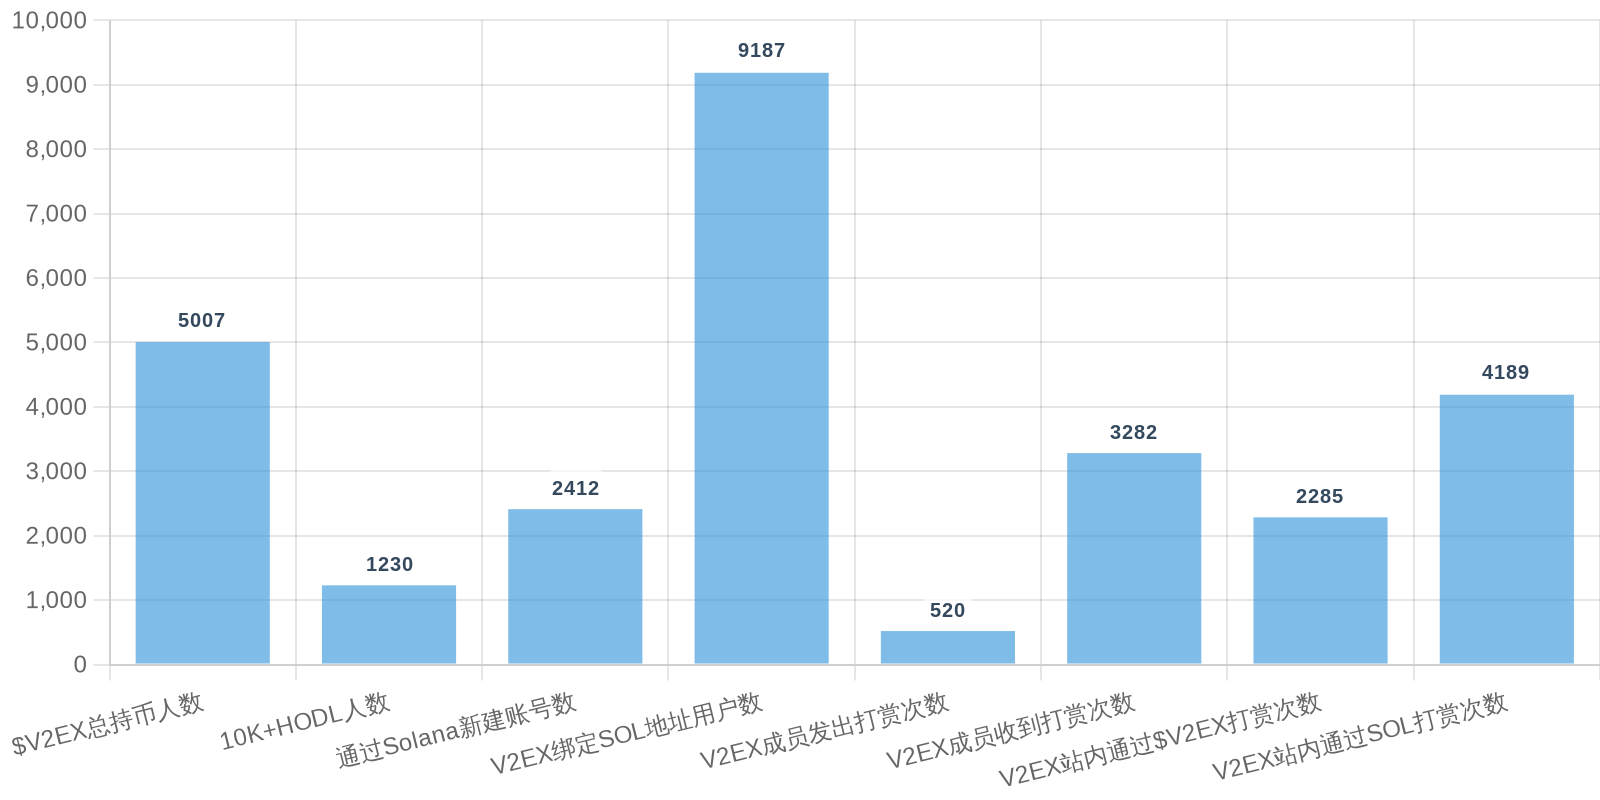
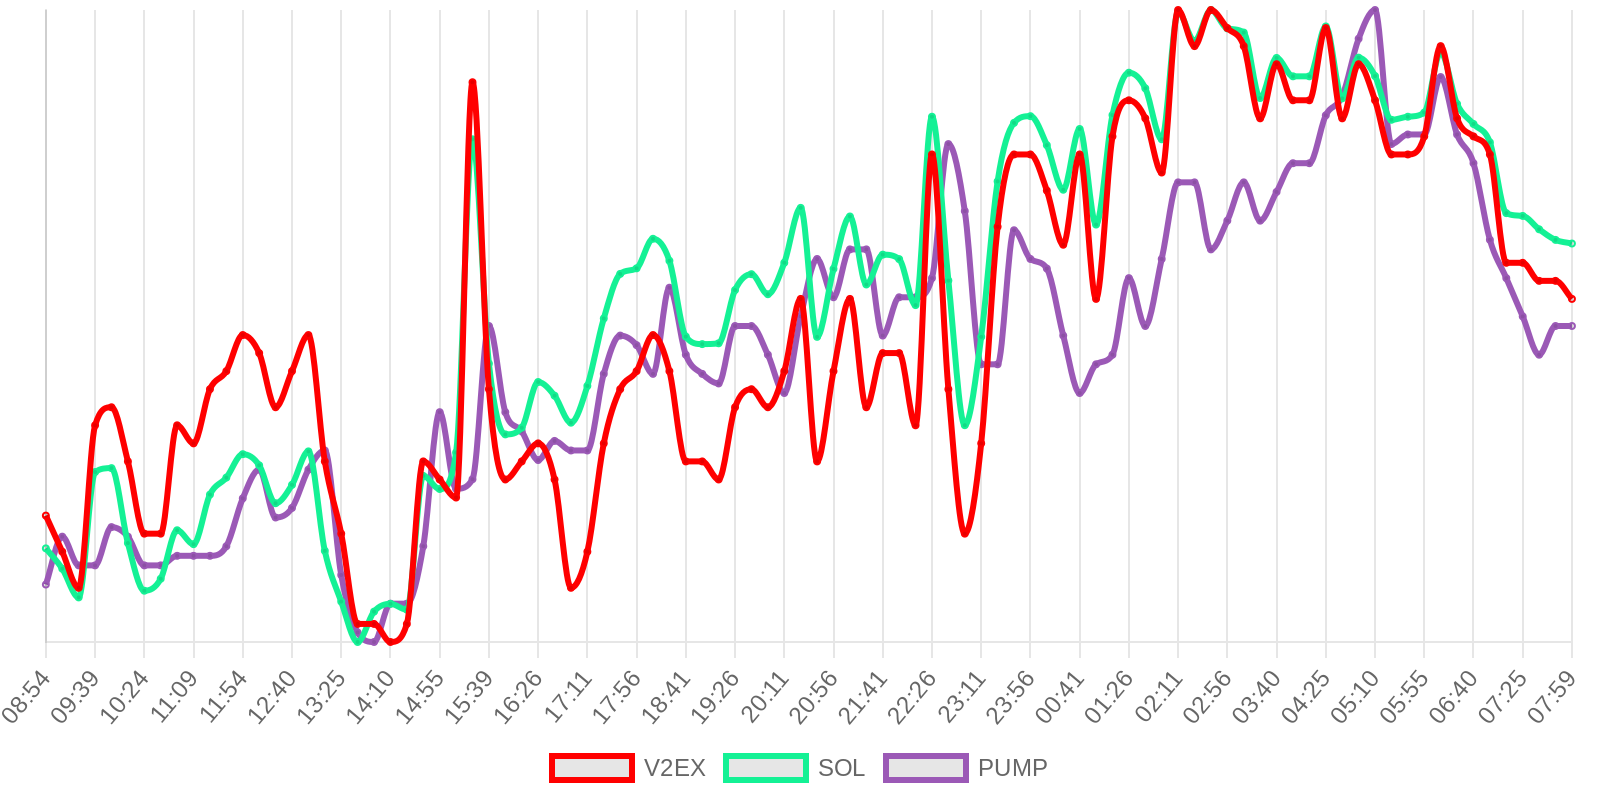
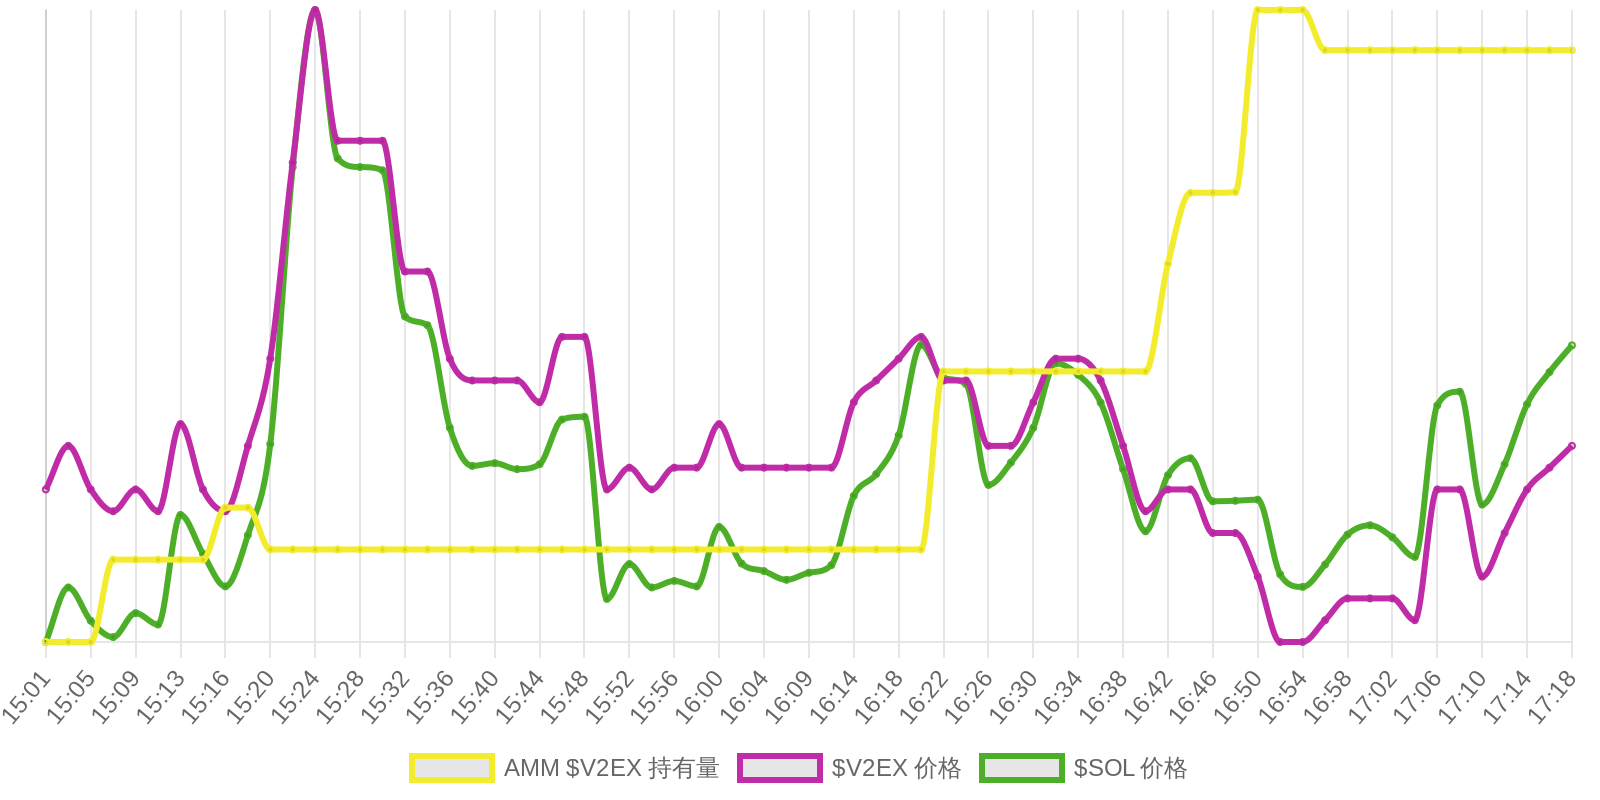
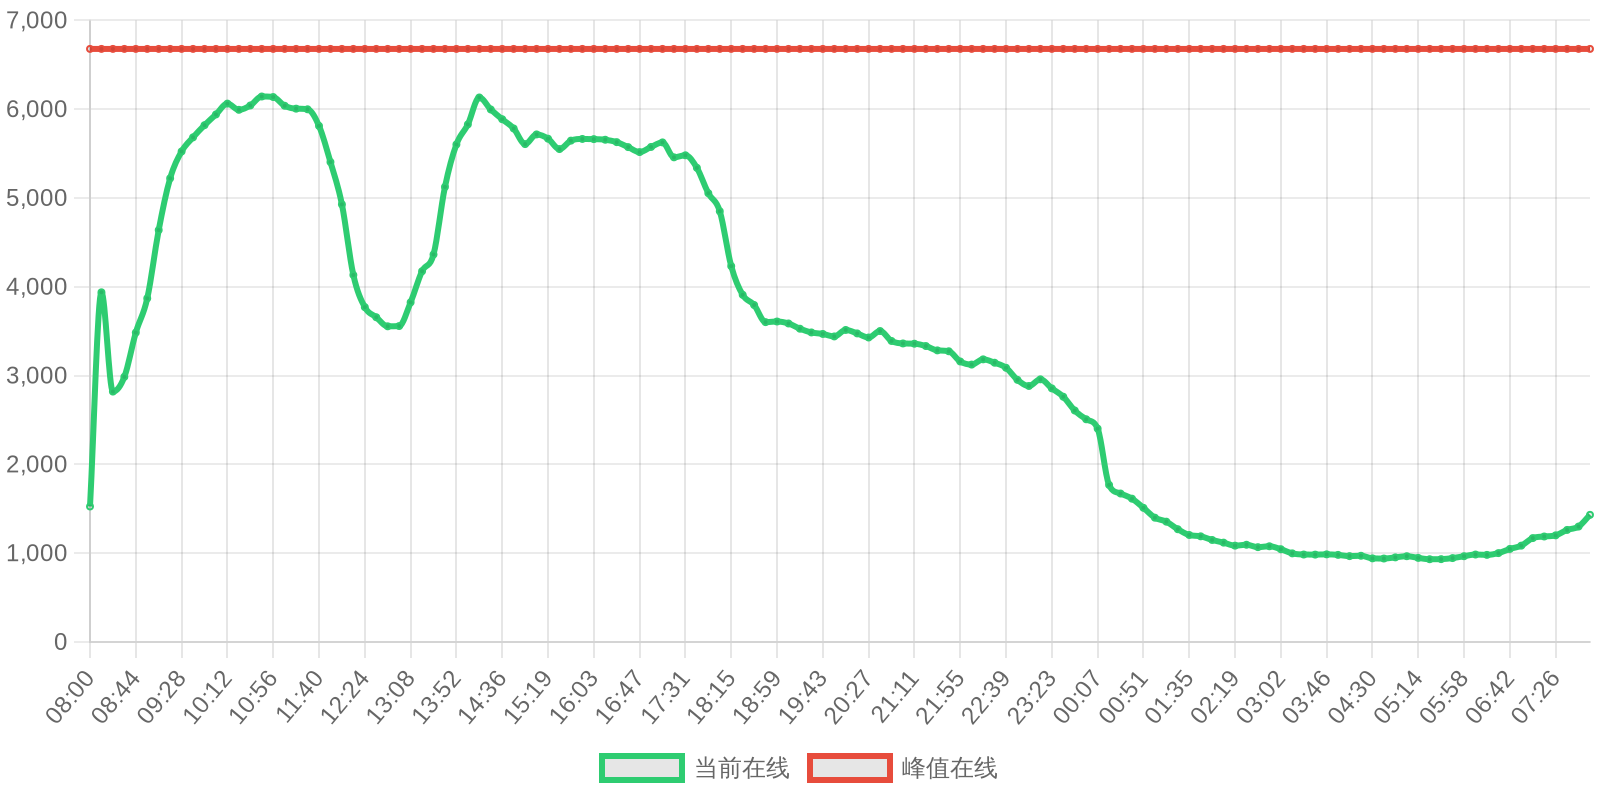
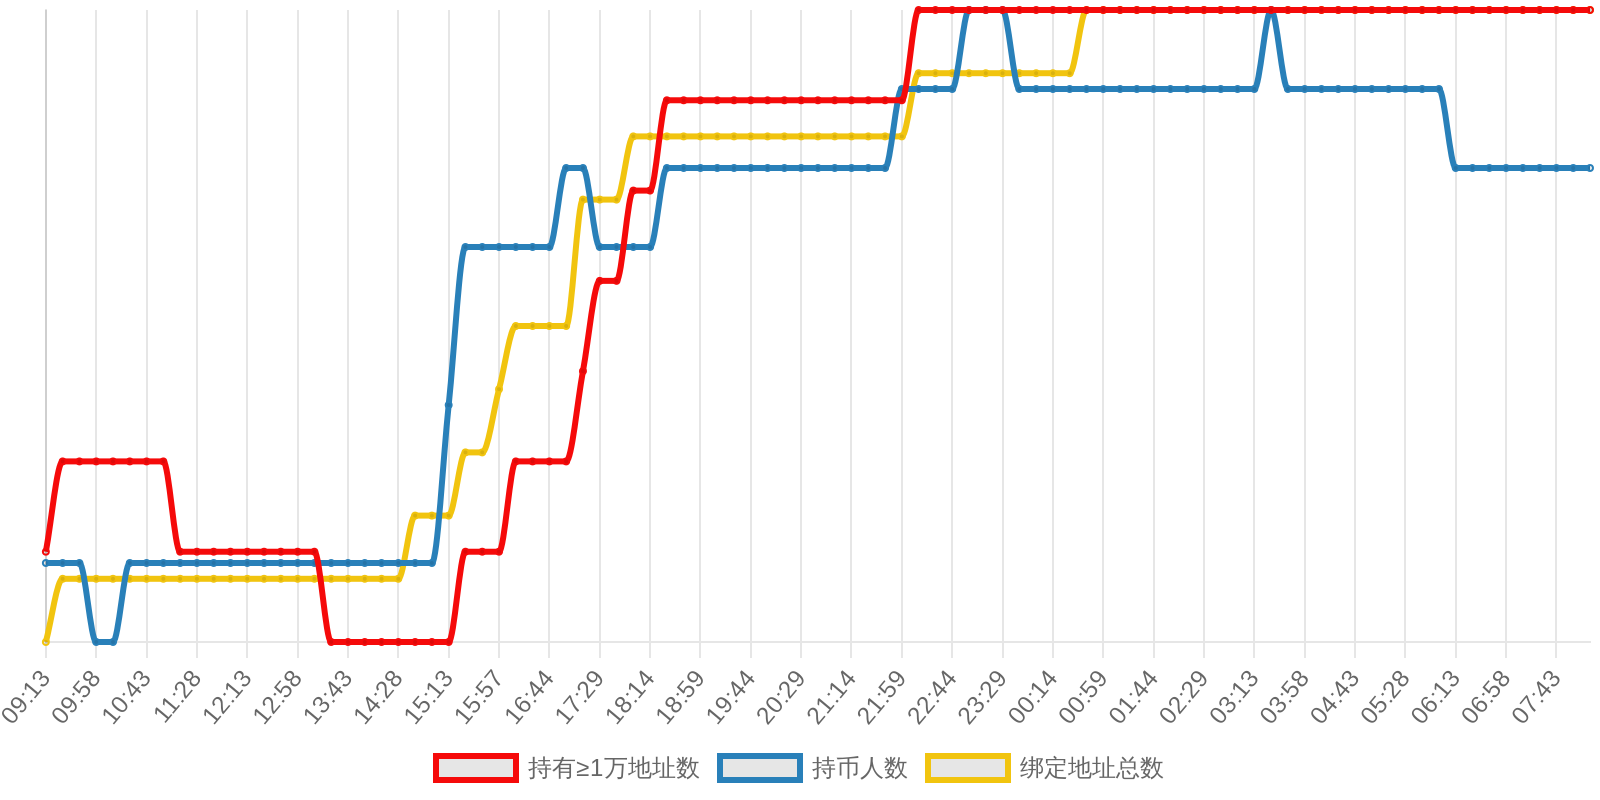
早上好!以下为昨日摘要:
SOL - $86.15 PUMP - $0.0018 V2EX - $0.0018


| 排名 | 地址 | 持有数量 | 持仓比例 | 排名变化 | 数量变化 |
|---|---|---|---|---|---|
| #2 | Pump.fun AMM (V2EX-WSOL) Pool | 52.44M | 5.24% | - | -0.52M |
| #9 | Meteora (V2EX-WSOL) Market | 5.03M | 0.50% | - | -4.62K |
| #11 | Meteora (V2EX-PUMP) Market | 4.94M | 0.49% | - | -6.66K |
| #13 | AT69...PHMp | 3.57M | 0.36% | - | +11.04K |
| #28 | Meteora (V2EX-WET) Market | 1.35M | 0.13% | -1 | -78.53K |
TG 机器人订阅: 点我订阅
原始图表与数据存放于: 点我查看
此报告由 V2EX Info 提供数据, 由 Newsletter Report Bot 自动生成。
此报告仅供参考,不构成任何投资建议。投资有风险,入市需谨慎。
早上好!以下为昨日摘要:
SOL - $86.89 PUMP - $0.0018 V2EX - $0.0018


| 排名 | 地址 | 持有数量 | 持仓比例 | 排名变化 | 数量变化 |
|---|---|---|---|---|---|
| #2 | Pump.fun AMM (V2EX-WSOL) Pool | 52.96M | 5.30% | - | -0.33M |
| #9 | Meteora (V2EX-WSOL) Market | 5.04M | 0.50% | -1 | +17.9942 |
| #11 | Meteora (V2EX-PUMP) Market | 4.95M | 0.49% | -1 | -501.27 |
| #27 | Meteora (V2EX-WET) Market | 1.43M | 0.14% | -2 | -80.34K |
TG 机器人订阅: 点我订阅
原始图表与数据存放于: 点我查看
此报告由 V2EX Info 提供数据, 由 Newsletter Report Bot 自动生成。
此报告仅供参考,不构成任何投资建议。投资有风险,入市需谨慎。
This is wild. You can now type a sentence and get a fully seamed 360 equirectangular image back in under a minute — ready for VR, Unity, Unreal, and web panorama viewers. No camera, no stitching. Free to try, commercial-use cleared.
早上好!以下为昨日摘要:
SOL - $86.06 PUMP - $0.0018 V2EX - $0.0018


| 地址 | 持有数量 | 持仓比例 | 数量变化 |
|---|---|---|---|
| Meteora (V2EX-WSOL) Market | 5.04M | 0.50% | -4.79K |
| Meteora (V2EX-PUMP) Market | 4.95M | 0.49% | -410.35 |
| Livid | 2.56M | 0.26% | +6.79K |
| Meteora (V2EX-WET) Market | 1.51M | 0.15% | -188.32 |
| JoeJoeJoe | 0.71M | 0.07% | +1 |
TG 机器人订阅: 点我订阅
原始图表与数据存放于: 点我查看
此报告由 V2EX Info 提供数据, 由 Newsletter Report Bot 自动生成。
此报告仅供参考,不构成任何投资建议。投资有风险,入市需谨慎。
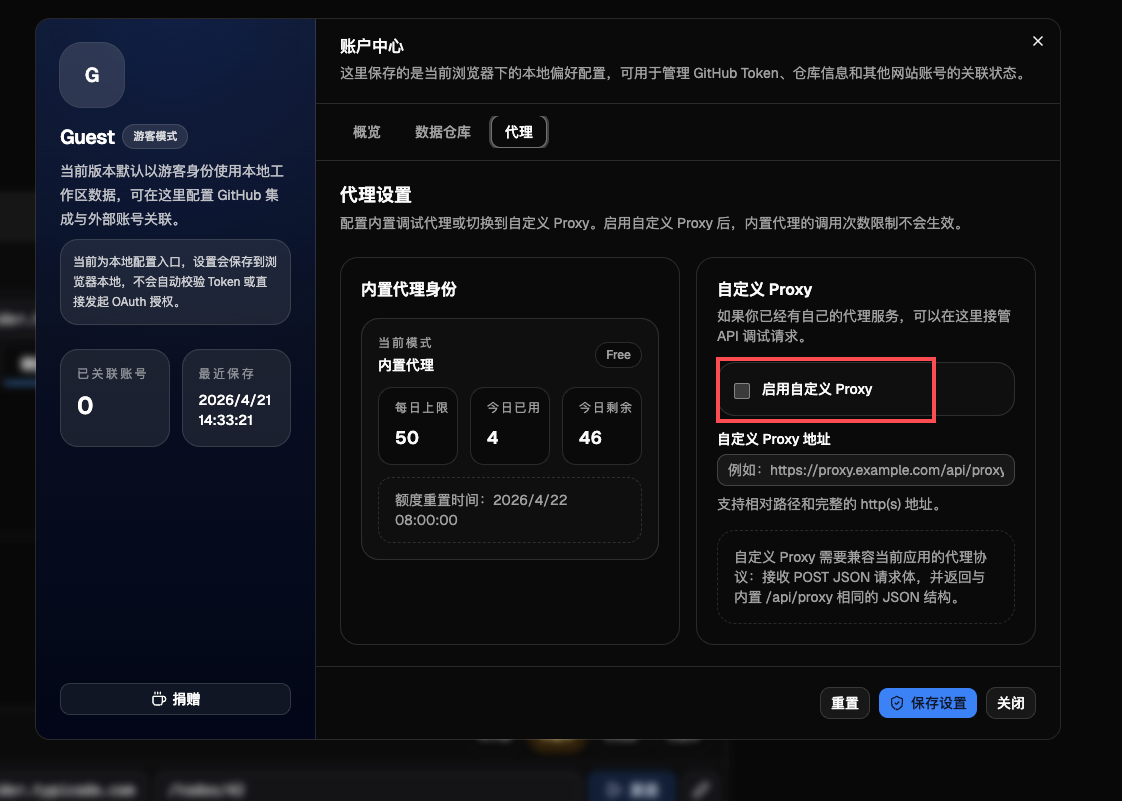
站点地址: http://oxapi.v2ex.info/
这有一个本地的 proxy 文件, 可以使用 node 启动, 放在个人中心的配置里:
https://github.com/HelloWorldImJoe/OxApiDocument/blob/master/local-proxy.js
启动命令: node ./local-proxy.js
大佬们给我提提意见, 我看看还有没有做下去的必要 🤡
附一个测试的 markdown 文件, 直接创建项目新建 md 文件就可以了:
https://github.com/HelloWorldImJoe/OxApiDocument/blob/master/Demo_API.md?plain=1
ps: 后续看看V站的记事本能不能有接口, 要是有接口的话, 这个文档完全可以存在记事本里. 当做自定义节点的产品发布者的api文档?
早上好!以下为昨日摘要:
SOL - $85.06 PUMP - $0.0018 V2EX - $0.0017


| 地址 | 持有数量 | 持仓比例 | 数量变化 |
|---|---|---|---|
| Pump.fun AMM (V2EX-WSOL) Pool | 53.57M | 5.36% | +0.28M |
| Meteora (V2EX-WSOL) Market | 5.04M | 0.50% | +4.62K |
| Meteora (V2EX-PUMP) Market | 4.95M | 0.49% | +0.106453 |
| AT69...PHMp | 3.56M | 0.36% | +27.76K |
| Livid | 2.55M | 0.25% | +30.16K |
| Meteora (V2EX-WET) Market | 1.51M | 0.15% | -1.00M |
TG 机器人订阅: 点我订阅
原始图表与数据存放于: 点我查看
此报告由 V2EX Info 提供数据, 由 Newsletter Report Bot 自动生成。
此报告仅供参考,不构成任何投资建议。投资有风险,入市需谨慎。
四月的第四周,工具列表突然变得拥挤。
brew update 之后跳出来一长串新增, 不是那种零星的点缀,而是成批的工具在找自己的位置。 有些是为了连接消息平台,有些是为了给 AI 代码助手加个壳, 还有一些,是 Apple Intelligence 落地后的余波。
AI 不再是单一工具,而是变成了需要被"连接"、"管理"、"编排"的基础设施——这周的更新像是在搭建一层中间件。
| 名称 | 中文说明 |
|---|---|
| cc-connect | 将本地 AI 编码代理连接到消息平台(Telegram/Slack/钉钉等) |
| odinfmt | Odin 编程语言的代码格式化工具 |
| ols | Odin 编程语言的 Language Server |
| openssl@4 | OpenSSL 的第 4 版主分支 |
| paneru | macOS 上的滑动/平铺窗口管理器 |
| pocket-id | 开源的身份认证提供商 |
| [email protected] | Zig 编程语言的 0.15 版本分支 |
| 名称 | 中文说明 |
|---|---|
| equibop | 定制版 Discord 客户端 |
| fluidvoice | 离线语音转文字应用,带 AI 增强 |
| font-bjcree | BJ Cree 字体 |
| font-estedad | Estedad 字体 |
| google-gemini | Google Gemini 桌面 AI 助手 |
| intellij-idea-oss | IntelliJ IDEA 开源版 |
| koharu | ML 驱动的漫画翻译工具 |
| macshot | 截图和录屏工具 |
| openin | 将链接/邮件/文件路由到指定应用 |
| pluralplay-flclashx | 基于 ClashMeta 的代理客户端 |
| puremac | 开源应用管理器和系统清理工具 |
| renameclick | 本地优先的 AI 文件重命名应用 |
| t3-code@nightly | AI 代码助手的精简 GUI |
| unblocked | AI 驱动的开发者协作平台 |
| xdeck | TweetDeck 风格的 X/Twitter 客户端 |
这一周的新增很多, 但有几个工具指向同一个趋势: **AI 代理正在从"工具"变成"需要被管理的对象"**。

一个公式,连上了 9 个 AI 代理和 11 个聊天平台。
cc-connect 做的事情很简单:让你在 Telegram、Slack、钉钉、飞书甚至微信里,直接调用本地的 Claude Code、Cursor、Gemini CLI 或其他 AI 编码助手。不需要公网 IP,不需要自己搭服务器,装完就能用。
它解决的不是"怎么用 AI 写代码"这个问题,而是"怎么在不离开聊天软件的情况下用 AI 写代码"。对于很多人来说,聊天软件已经是工作流的中心——团队讨论在那里,任务分配在那里,现在 AI 代理也要去那里。
43 个安装量说明它还很小众,但这种"桥接"本身是一个信号:AI 代理不再是单独打开的应用,而是要被嵌入到现有工作流里的服务。
Web 管理界面可以配置多个项目,支持多代理编排、会话管理、模型切换——这些功能出现在一个 Homebrew formula 里,有点意外,也有点合理。

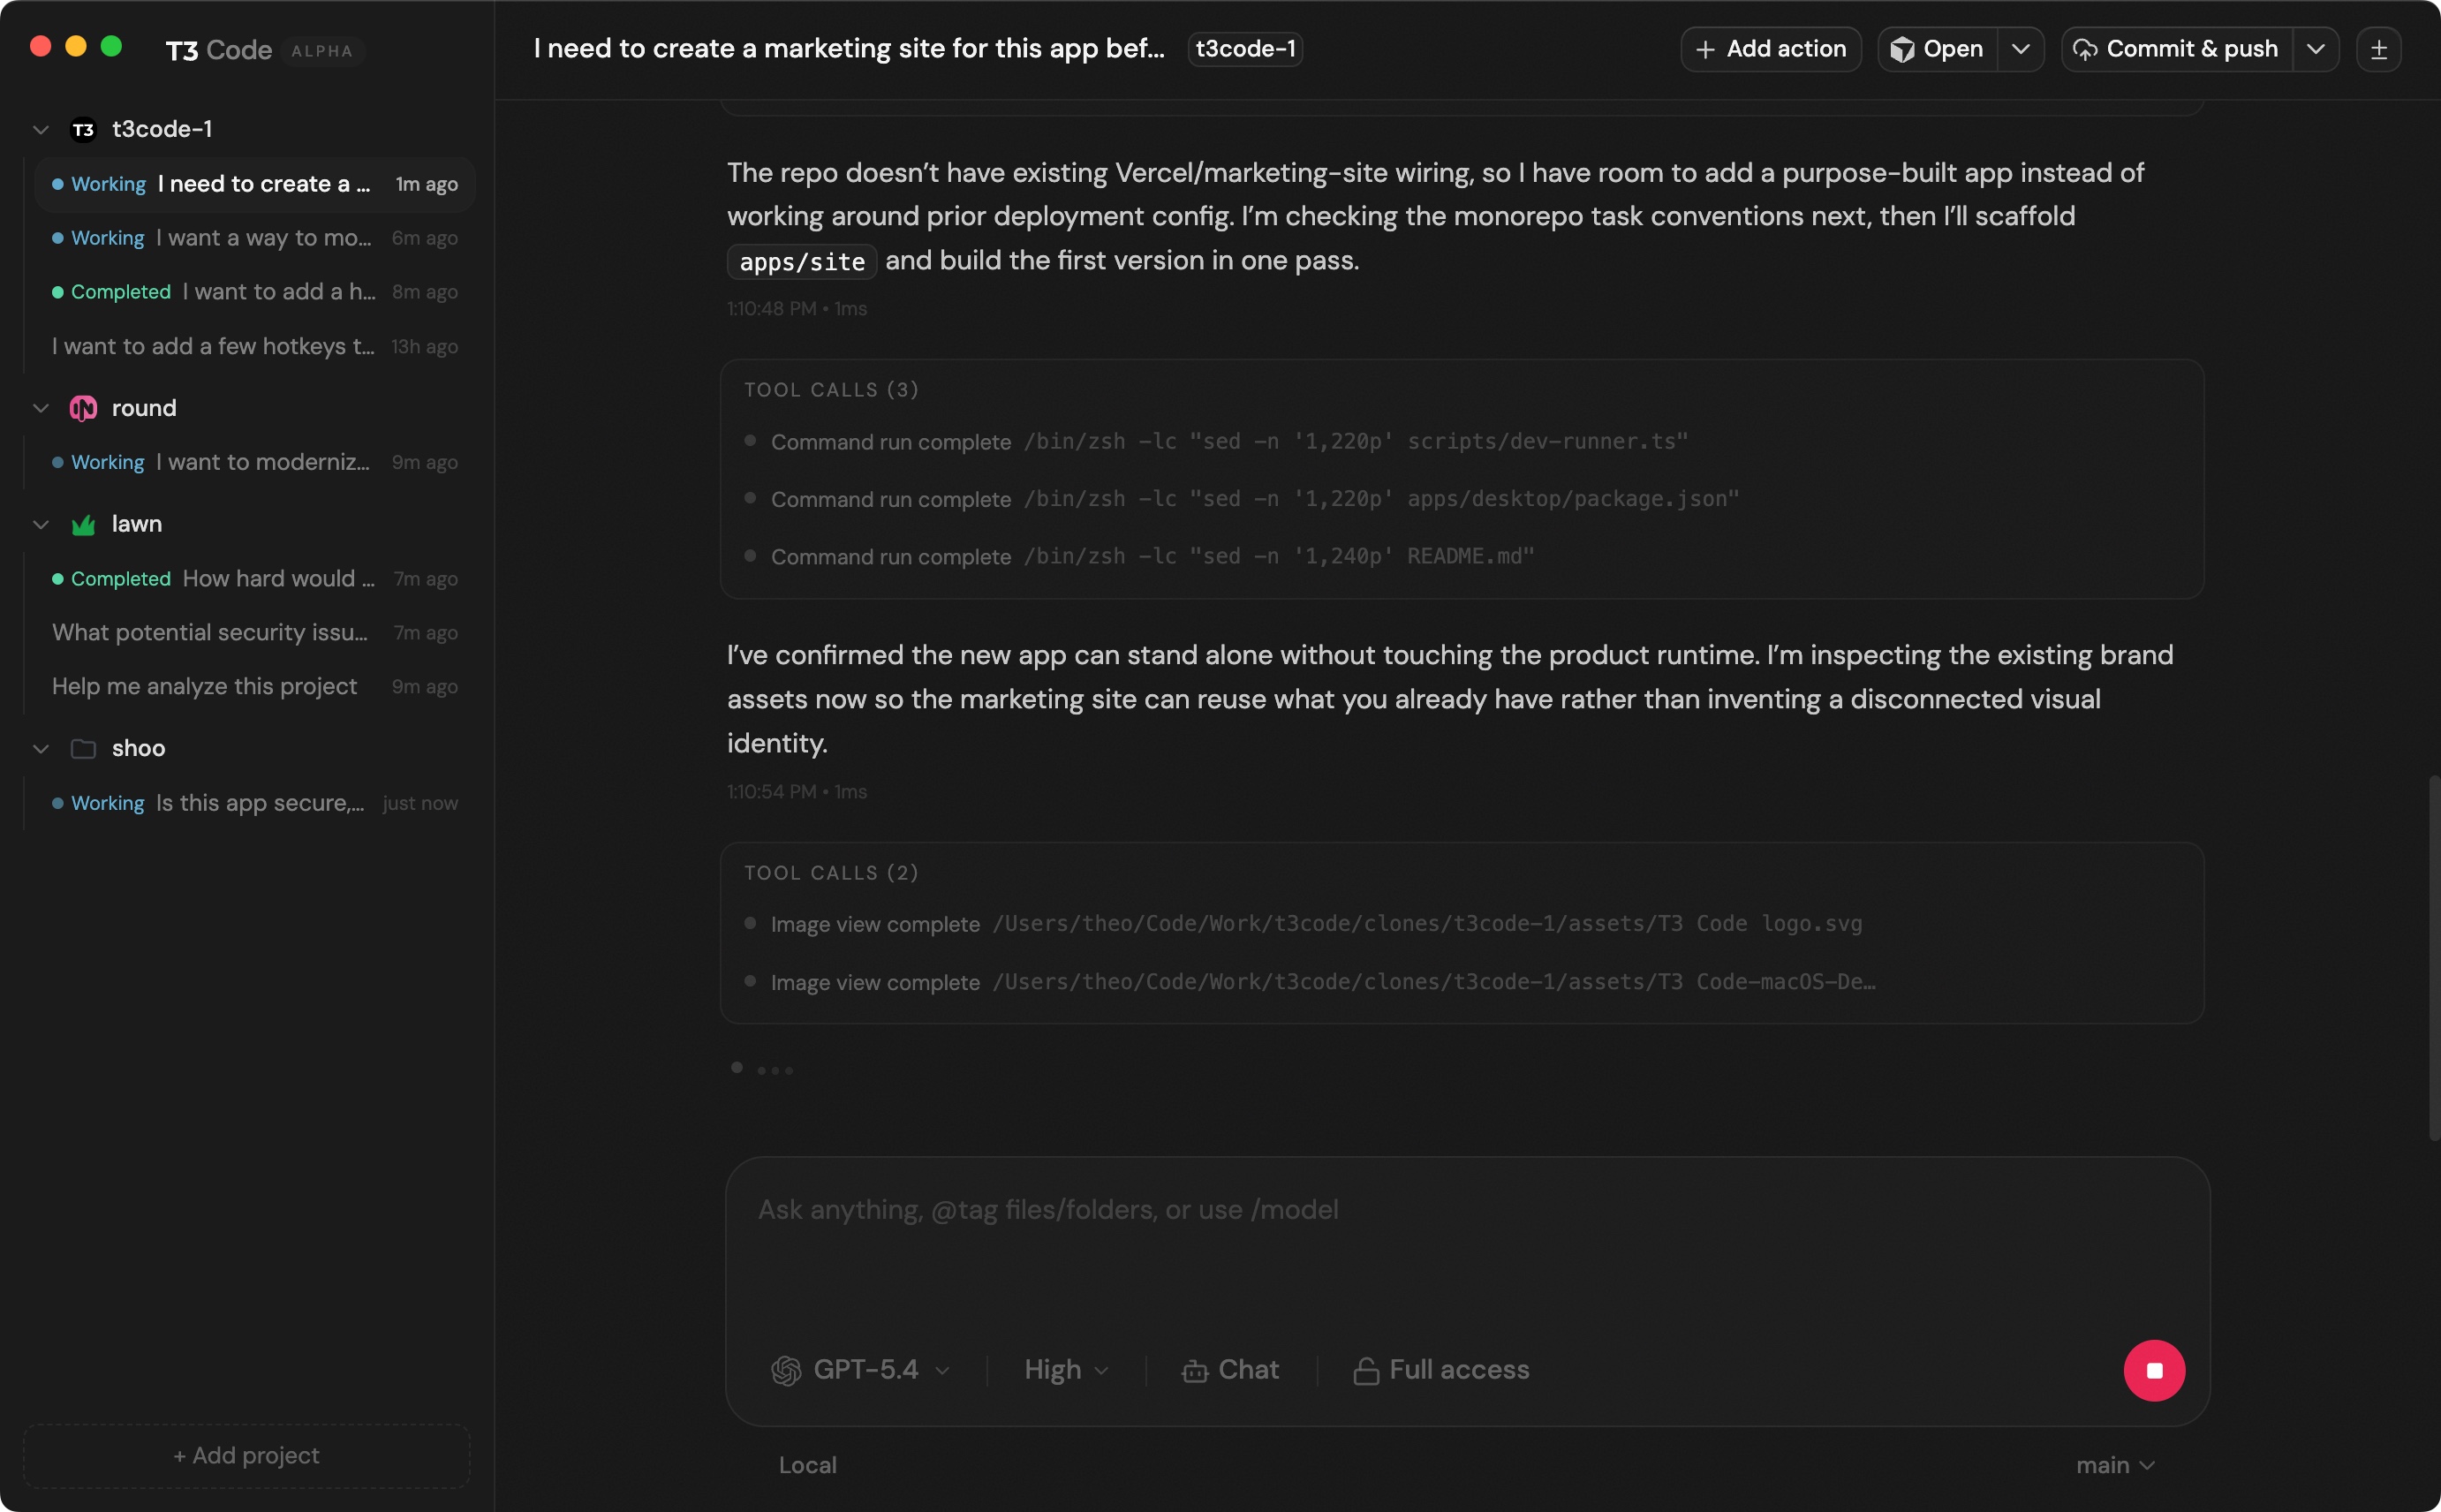
T3 Code 是一个"minimal GUI for AI code agents"。它的逻辑更直接:既然 AI 代理已经在后台跑了(Claude Code、Cursor、Aider 等),那给它套个简单的图形界面会不会更好用?
界面确实简单:左边是文件树,右边是对话框,底部是终端输出。没有 VS Code 那么重的插件系统,没有 JetBrains 那么复杂的配置菜单,就是一个能让你和 AI 对话、看它改代码的窗口。
这种"精简"背后有个隐含判断:当 AI 能处理大部分编码任务时,IDE 的复杂度就变成了负担。你不需要那么多快捷键,不需要那么多面板,只需要一个能让 AI 展示它工作的地方。
nightly 版本的存在说明这个项目还在快速迭代中。43 个安装量和 cc-connect 一样,都是早期采用者的数量级。
Google Gemini 桌面应用在四月登陆 macOS,要求 arm64 架构和 macOS 15+。2380 个安装量是这周所有新增里最高的。
它的出现有个背景:Apple Intelligence 在国内用不了,而 Google 的 Gemini 应用刚好填补了这个空白。不是所有人都愿意折腾区号、换账号,但所有人都想要一个能在桌面上随时唤起的 AI 助手。
FluidVoice(离线语音转文字,170 安装量)也是同样的逻辑:当系统自带的听写功能不够好或者不可用时,第三方的 AI 增强方案就成了刚需。
这两个工具的共同点是"补位"。它们不是创新,而是在现有生态的空缺处填上自己的形状。
如果把 cc-connect、t3-code、pocket-id(身份认证)、renameclick(AI 文件重命名)放在一起看,能看到一个模式:
AI 不再是单一工具,而是变成了需要被连接、管理、认证、封装的基础设施。
这和十年前的"云服务中间件化"很像。当时出现了 Kubernetes、Docker Swarm、Consul 这些工具来管理微服务;现在出现了类似的工具来管理 AI 代理。
区别在于,这次的速度更快。从"AI 助手能用"到"需要管理 AI 助手",只用了不到两年。
Odin 语言工具链成熟:odinfmt(格式化)和 ols(Language Server)的同时出现,说明这个自称"为稳健性、最优性和清晰度设计"的系统编程语言正在形成完整的开发体验。Zig 0.15 的独立分支也是同一件事的另一面。
paneru:窗口管理器的长尾需求:macOS 上的平铺窗口管理器一直有小众但稳定的需求(Amethyst、yabai、Rectangle 各有拥趸)。paneru 的出现说明这个细分市场还有空间。
OpenSSL@4:版本号的惯性:OpenSSL 跳到第 4 版主分支,但绝大多数人还在用 1.x 或 3.x。keg-only 的打包方式说明了 Homebrew 的态度:给你装,但不主动 symlink,让你自己决定要不要用。
这周的新增列表读起来有点像在翻某家创业公司的产品目录。不是那种"又多了个 XXX 工具"的平淡,而是"原来这个环节已经有人在做产品了"的惊讶。
cc-connect 和 t3-code 这类工具的出现,说明 AI 编码助手已经从"尝鲜阶段"进入了"需要被整合进工作流"的阶段。这不是技术突破,而是工程化。
我注意到两个细节:
安装量都很低:43、43、170……这些数字说明还在早期。但对于 Homebrew 这种分发渠道来说,早期采用者的选择往往预示着下一步的主流。
夜间构建版本的增多:t3-code@nightly、vlc@nightly(虽然即将被废弃)……这说明有些项目正处于快速变化期,稳定版跟不上节奏。
还有一点主观的感受:当"管理 AI 代理"变成一个独立的需求类别时,有点讽刺。我们本来指望 AI 能简化管理工作,结果反过来要管理 AI 本身。但这可能就是技术演进的路径——每一层抽象都会带来新的复杂度,然后再催生下一层抽象来处理它。
工具在变多,但节奏不必跟着变快。
这周新增了 7 个 Formula 和 15 个 Cask,是近几个月最热闹的一周。但真正值得记住的不是数量,而是方向:AI 正在从"用来做什么"变成"怎么被组织起来"。
有时候,brew update 之后看到的不只是新工具,还有工具之间的空隙——以及填补那些空隙的新工具。
是因为从pump中取top的数据接口异常, 导致数据获取不到, 进而影响了整个数据采集系统.
相关问题已经修复, 明天的日报应该会正常.
给大家造成的不便, 万分抱歉!
Anna's hummingbird nest surrounded by cherry blossoms.
Two tiny chicks, just hatched, waiting quietly as their mom feeds them.
Two weeks later, one baby fledged, with its mouth wide open, still dependant. Another baby was also about to leave the nest, still enjoying the warmth of its mother while it remained inside.
Nature at its most delicate and beautiful.
The first AI image generator that actually writes text.
Been putting Duct Tape through its paces this week. Product labels, Korean subtitles, price cards, handwritten notes — all legible on the first generation. No reroll loop, no Photoshop pass.
Character and brand consistency stay locked across shots, so you can ship a whole campaign from one prompt. Every image is cleared for commercial use, too.
If you've ever rerolled 40 times just to get readable text on a poster — go try it. Free tier, no credit card.
FBA4DSTWO 适配 MAME 0.141 MAME4ALL 适配 MAME 0.37b5
如果 V2EX 上有一个不永久保存聊天记录(比如只保存 7 天或者 24 小时)的聊天室,那么会开启哪些有用或者有趣的可能?
比如 Channel 的唯一来源是自建节点?